
Prerequisites
-
Deck / XRCenter - To launch a CAVE / Powerwall session on your selected experience you need to launch it through Deck that you must have previously configured (either standalone or connected to XRCenter)
-
Cave Daemon - A Cave Daemon needs to be installed on every computer that run a cave node. It will then manage skyreal installation and launching sessions for you. If the computer where deck is installed is also a node, it needs a cave daemon (same goes for powerwall)
1- Installation and Setup on PC Master
-
Installation of XR center, is it’s standalone machine
-
Installation of package client : Deck, PrepImporter, SkyrealVR and also CaveDaemon
-
Setup Deck configuration on PC master before installation of CaveDaemon on Slave Computer
2- Deck configuration on Master Computer
In deck you first need to enable the cave management plugin. For this, edit deck.json in deck config folder (C:\ProgramData\Skydea\deck by default) and add this :
"OptionalPlugins": [ "SkyReal Deck Cave Management" ]
All settings related to cave/powerwall will then be managed through the cave-settings.json file located in deck config folder (C:\ProgramData\Skydea\deck by default).
In this file, you have to have 3 paths :
"SkyrealVrInstallerPath": “ “
"NDisplayConfigurationPath": “ “
"VrpnConfigurationPath":” ”
And in the DaemonsSetting section, you must have as many node identifiers as there are slave PCs. This section is what links the master PC to the various slave PCs.
The Ndisplay file is in “C:/programData/Skr/1.22/Deck/NDisplayConfigurationPath” This is the file that configures the projectors with their size, resolution and technology, as well as the associated slave PC.
We provide the client with a sample file if required, but it is possible to create one using Unreal.
Every time you edit theses files directly, don't forget to restart deck so that changes are taken into account.
3- Create NDisplay Configuration File
The .ndisplay configuration file is used to configure you room setup, such as the different device and screens, their position, etc.
As of Unreal Engine 5.0, this configuration can now be done visually in the Engine for an easier setup. To do so, either create an empty Unreal Engine project and enable the NDisplay plugin or just use the NDisplay Starter Project. Then, create an asset of type nDisplayConfig.
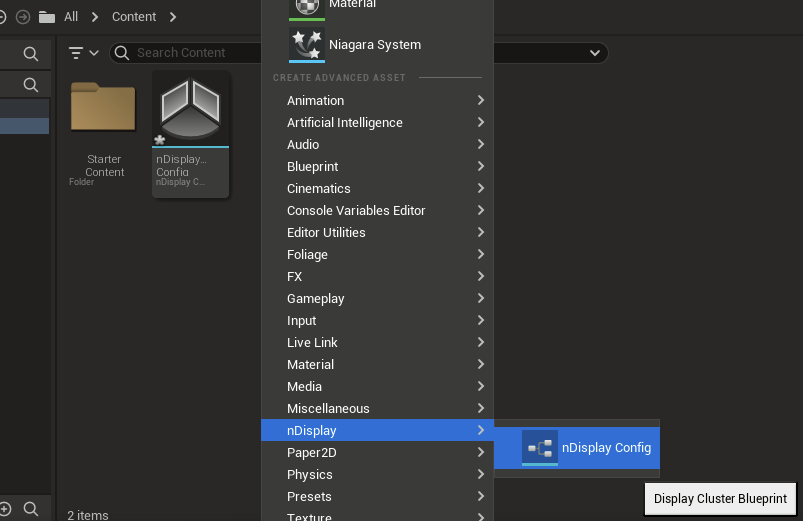
You can then open this asset to edit your config.
a. Room configuration
In the top part of the screen, this is where you will setup the configuration of your screens. Select the nDisplayScreen you want to edit.
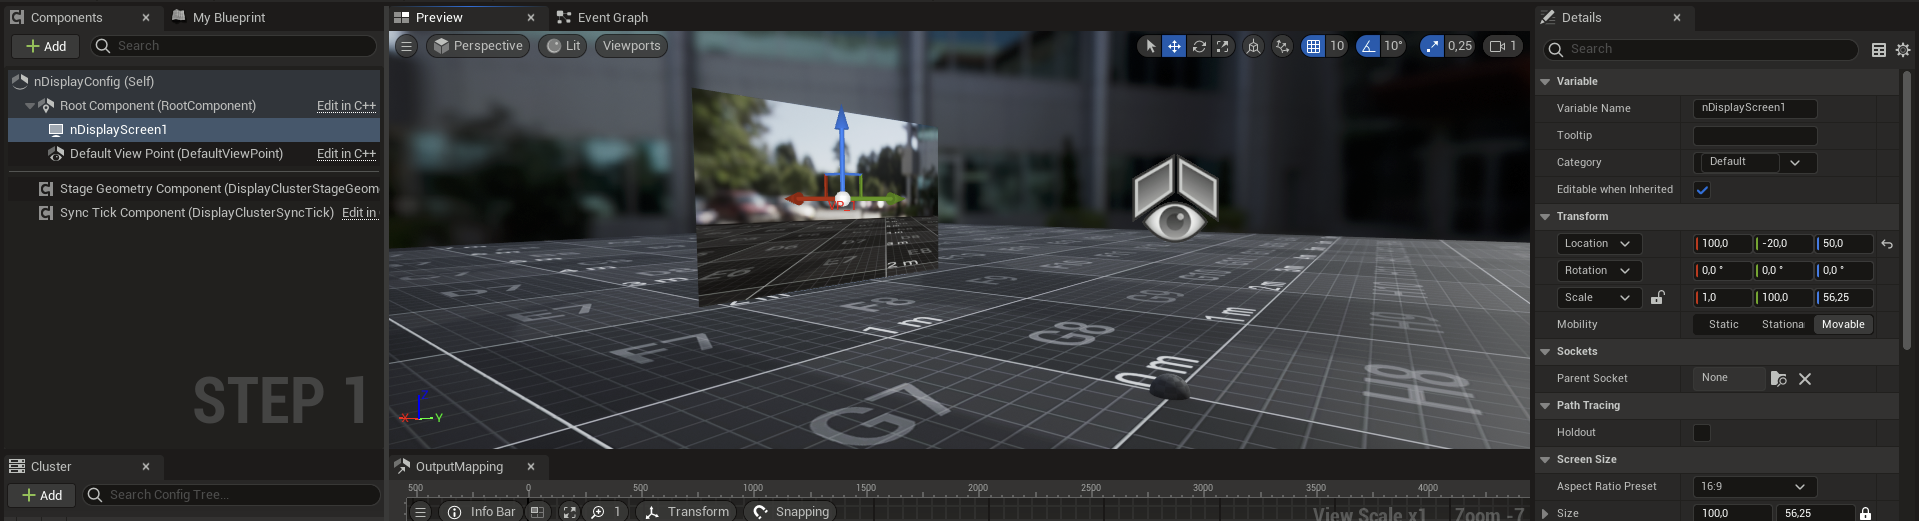
You can then change the size of the screen using the scale parameter : Y value represents the screen width, and Z value the screen height, both are in centimeters. You can also move and rotate the screen around using the gizmo or the location parameter : the goal is to measure the physical distance between the screens and the tracking origin and to replicate it in ndisplay.
Create new nDisplayScreens and repeat this step for as many screens as you have :
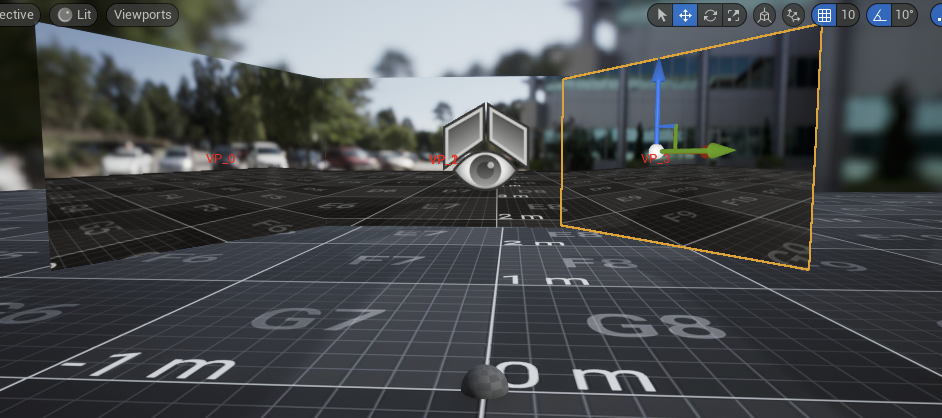
Facultatif Parameter option:
If you want the Skyreals menus to be displayed at a specific location in your Cave when using the Cave Docked Interfaces Mode (often located at the center or on the sides of your screens), you can drop NDisplay Transform Components with specific names in your config file to tell Skyreal where to place these menus. By default, Skyreal will try to smartly place them on your identified main screen (either the only screen, or the one named "nDisplayScreen"). The names you can give are the following :
"watch_origin" : if you just want the watch to be placed there.
"watch_origin_right" and "watch_origin_left" : if you want to setup specific watch locations for left and right mode.
"menu_origin" : location for all other skyreal menus, like laser pie menu, tool picker, ...
The transforms should be placed with the same rotations as the screens, I.E red arrow pointing away from the viewpoint.
If you want to increase the watch's scale, you can add a ?scale=wantedscaling after the name of your component. For example, to have the watch be 2,5x bigger, name your component watch_origin?scale=2.5 However this scale parameter is not available with menu_origin, a solution to have it appear bigger is to place the transform closer to you.
Cluster nodes
In the bottom part of the screen, this is where you can setup your cluster nodes. Cluster nodes are the computers on which your powerwall will run.
Here you will need to setup the nodes to have the same names and IP adress as in deck's config file.
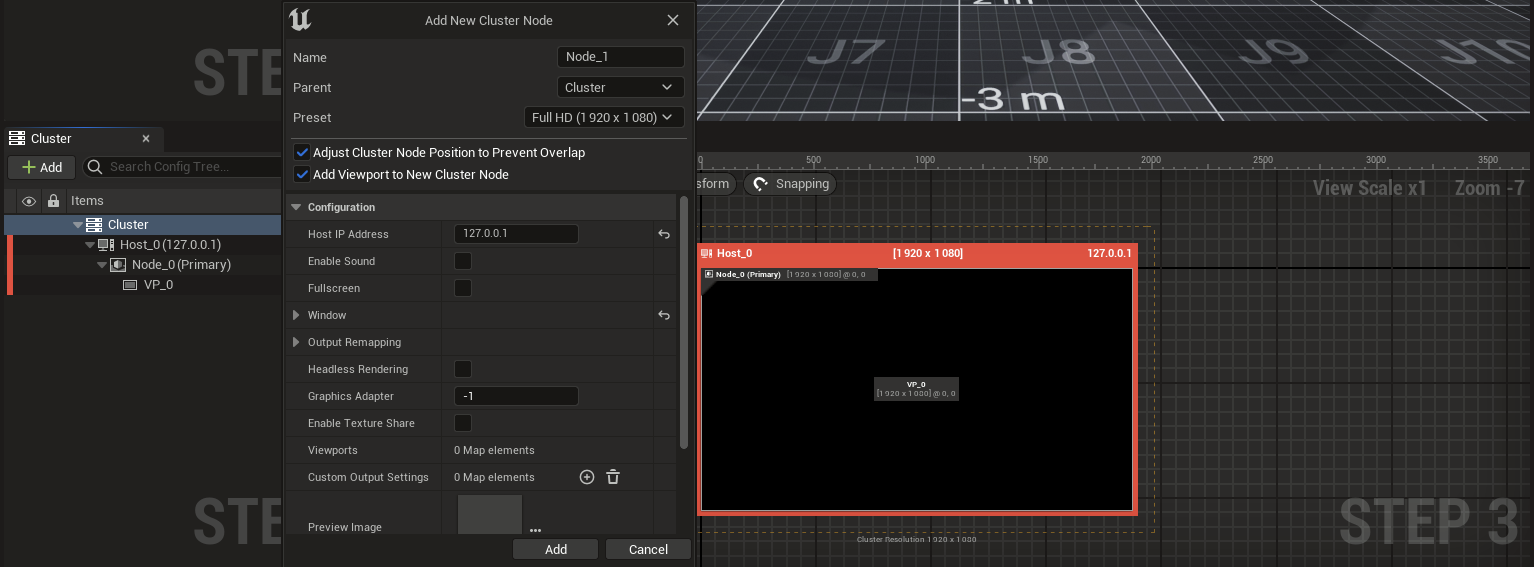
Your newly created node will now contain a viewport by default. You can also decide to have multiple viewports per cluster node. To receive an image on your viewport, you need to change the settings as follow :
Set ViewOrigin to DefaultViewPoint Set ProjectionPolicy - Type to simple For the Projection Policy - Screen setting select which nDisplayScreen your node will render.
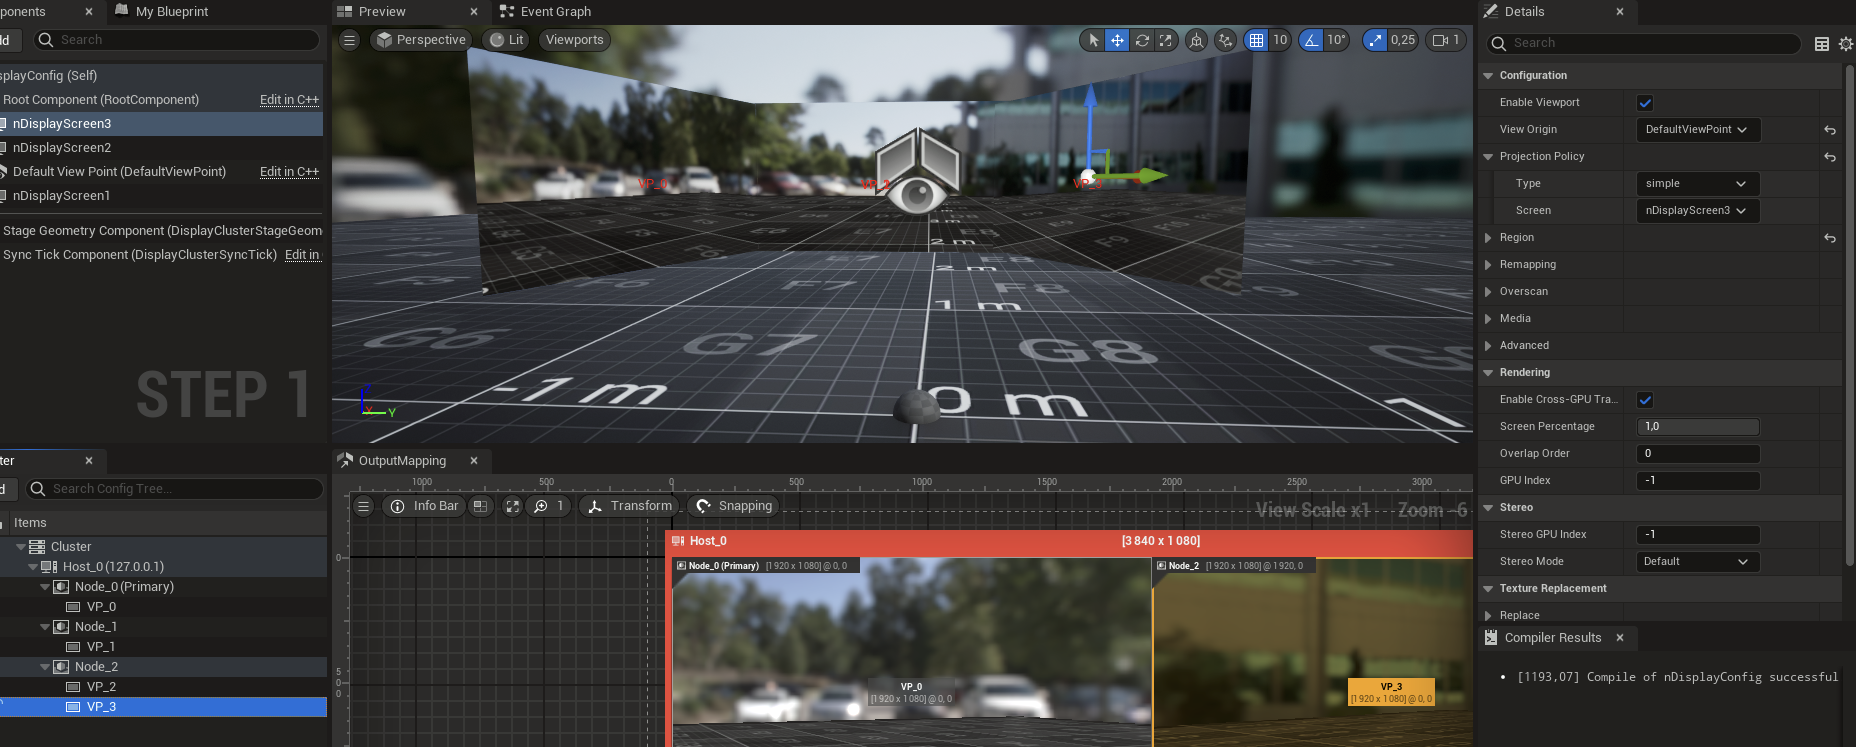
You can also read the detailed Unreal documentation here nDisplay 3D Config Editor in Unreal Engine to help you setup your ndisplay config file.
When you are done, click export at the top of the window to export your config as a .ndisplay file. This file is viewable as text so you can also edit it manually. If you want to edit your config in the editor again, either save your unreal project or use the import button in the ndisplay config editor to retrieve the config from a saved .ndisplay file.
Install and Setup Cave Daemon on Slaves Computer :
First you will need to install cave daemon executable on every computer slave. The Cave Daemon drive a node. For this just use the cave daemon installer
To ensure the daemon starts automatically, I recommend installing CaveDaemon.exe as a service, just like the XR Centre services. By default the path is C:\Program Files\Skr\1.22\CaveDaemon and open a cmd as admin there and type :
.\Skr.CaveDaemon.exe service install
then to start it either launch it by double clicking on the .exe or type
.\Skr.CaveDaemon.exe service start
