
In Skyreal, you can create manikins and place them in the scene. Five avatars areavailable by default. These manikins can be customized and adapted to supportdifferent studies.
What can we do with Manikins
-
Modify its shape, size and percentile
-
Adapt different postures, use my avatar as a manikin or incarnate anotherone in VR
-
Attach tools to hands and simulate positions
-
Set up a full body tracking system and perform action in VR
-
Record an animation of myself or incarnated manikins
-
See in collab mode someone performing an action
How to Use in Desktop
The Manikin command can be accessed from the Add to Scene menu in the left side menu.
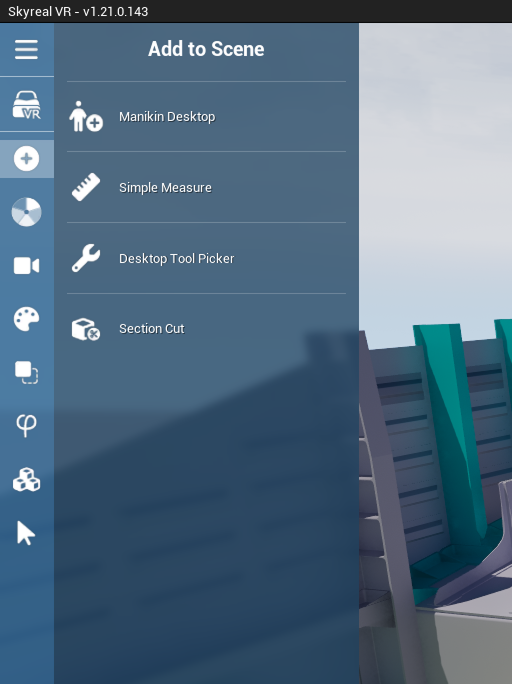
This opens the Manikin floating menu, which lets you create a new manikin and proceed to place and edit it.
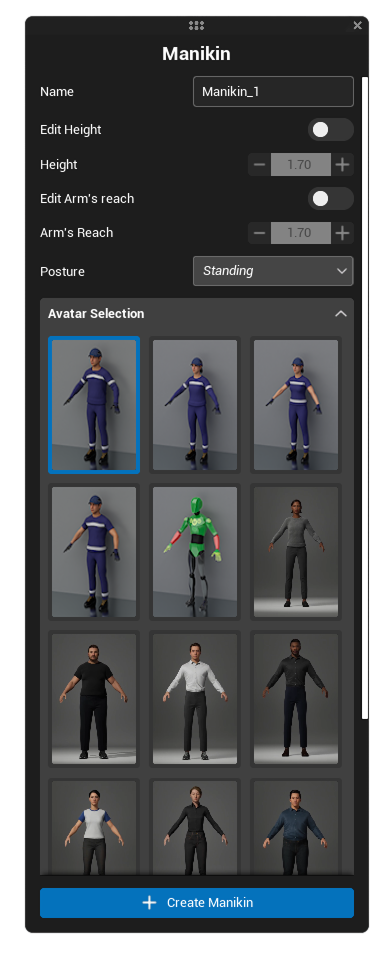
To close the menu (and leave the command), you can either click the X on the top-right of the floating menu or confirm by clicking the check button on the left side of the screen.
Create/Edit a Manikin in Desktop
To create a new manikin, click on the Create Manikin button. This will hide the menu and attach a manikin to your mouse pointer:
-
Click once to place the manikin in the environment.
-
Click a second time to define the manikin's orientation.
The manikin is now created.
You can edit any manikin by clicking on it. If you are already in the Manikin command, you can directly edit it in the menu. You can also press M on your keyboard to enter edit mode.
|
Name |
You can write your own manikin's name. If you chose to leave it empty, the default name will be "Manikin_#" |
|
Edit Height / Height |
Activates / Change manikin's height |
|
Edit Arm's Reach / Arm's Reach |
Activates / Change manikin's arm's reach |
|
Posture |
By default, the Manikin will appear in a normal standing position, you can also select seated or lay down positions. |
|
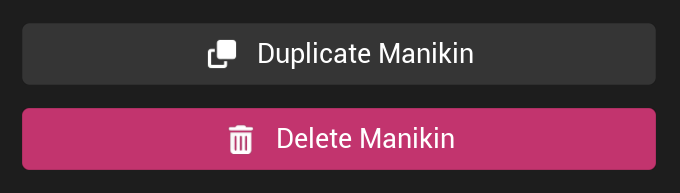
Duplicate Manikin |
Relaunch manikin creation using the exact same settings as the selected manikin. |
|
Delete Manikin |
Delete the selected manikin, a deleted manikin goes to the trash world. |
Avatar Selection
This section allows you to browse all available avatar models (default ones and those added via extensions).
By default, you will find the “Workers” avatar style, as well as the MSD Avatar, which is ideal for creating, analyzing, and reproducing ergonomic postures.
Keep in mind that each avatar has its own height and body proportions.
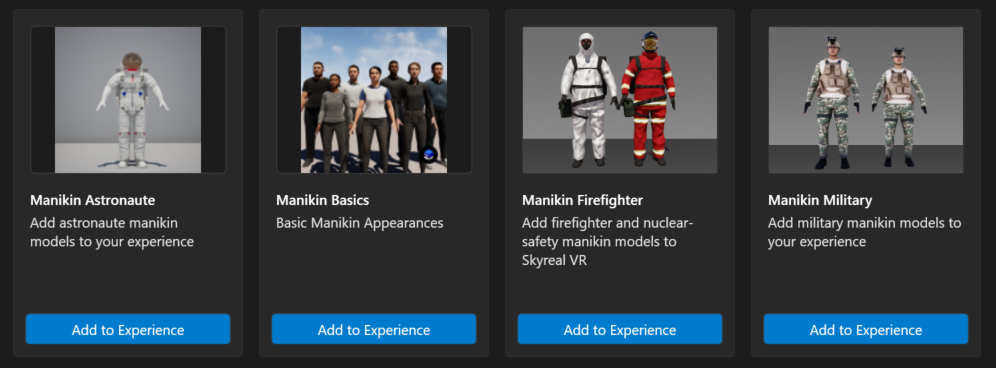
You can download more manikins from Deck’s marketplace: each pack has several manikins
Available manikin extensions include:
-
Basics – MetaHumans representing standard human avatars
-
Firefighter – includes two avatars dressed as firefighters
-
Military – avatars based on specific human percentiles
-
Astronaut – our latest addition, featuring an avatar with astronaut gear
MSD Settings
These parameters (based on the RULA standard) are used to analyze workers’ postures. Each parameter selected in this UI influences the final score calculation.
When you activate the Show MSD option, colored 3D spheres appear around the avatar, providing a visual indication of the posture score, as the MSD avatar's score in the UI.
Ergonomic reports can be generated with any manikin, though the MSD manikin avatar offers more precise analysis.
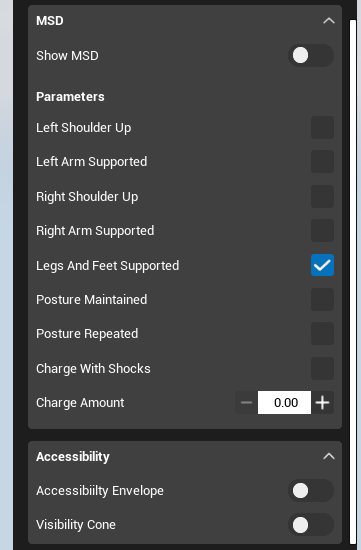
Accessibility Options
You can activate accessibility options on each manikin (see Manikin Settings for more information).
Edit Effectors
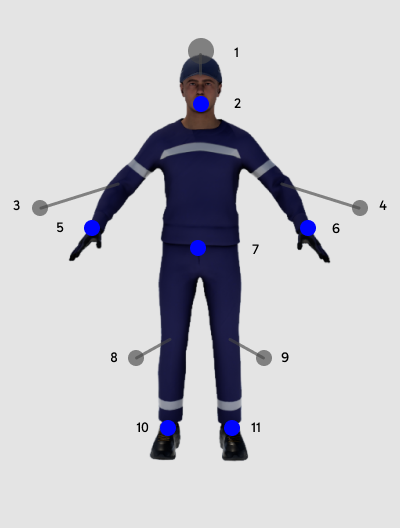
You can also edit individual effectors on each manikin. (see Manikin Settings for more information).
How to Use in VR
You will find the Manikin command in the default Manikin sub menu of the pie menu.
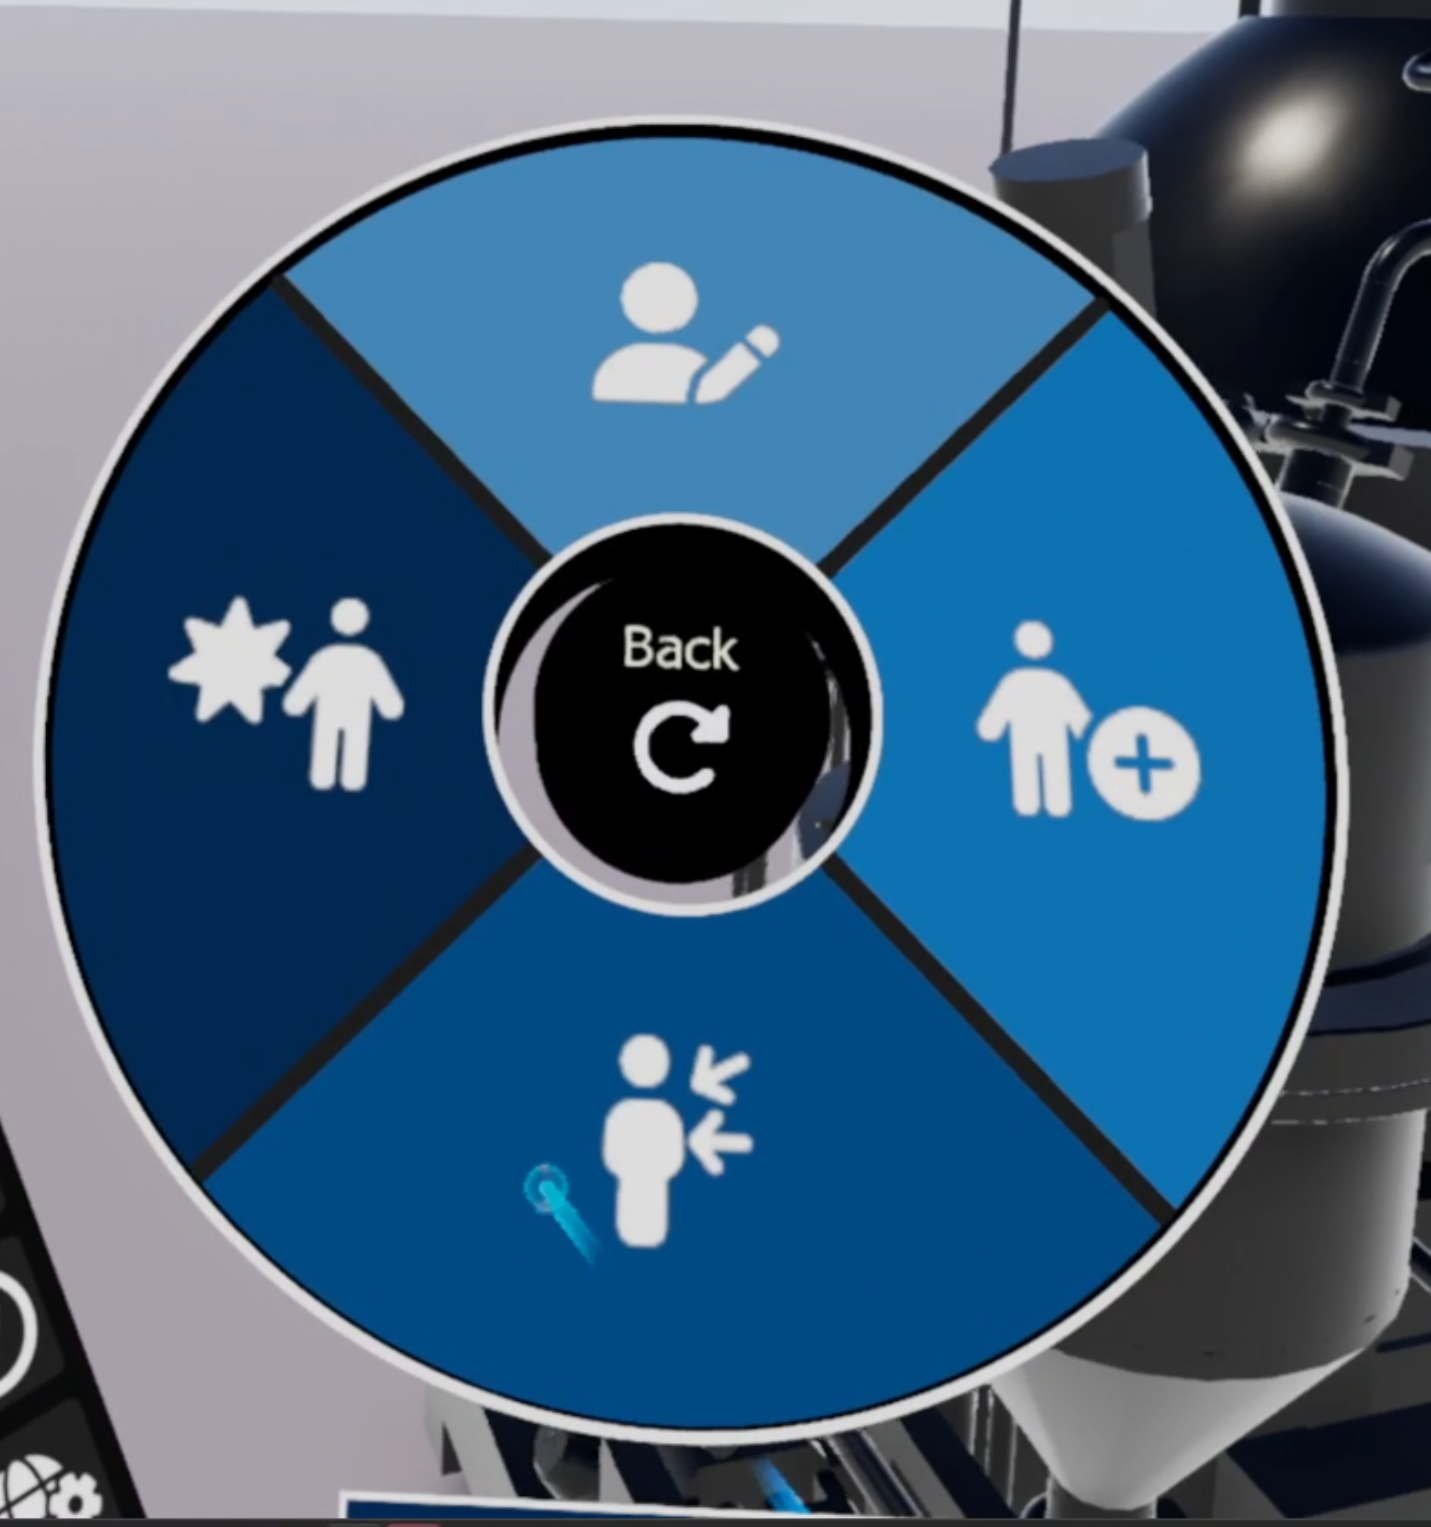
If no manikin is selected before launching the command, you will start the creation workflow. If a manikin is already selected when you launch the command, you will go directly to the manikin edition interface.
Create a Manikin in VR
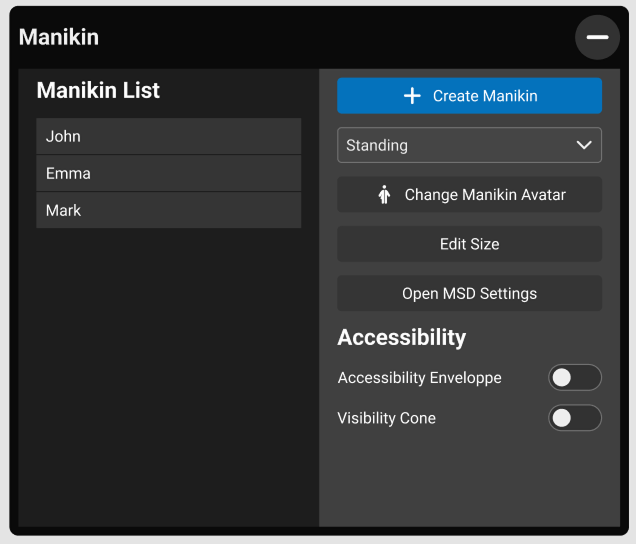
To create a new manikin, click on the Create Manikin button. This will open your tablet without any manikin selected in the Manikin List:
-
Click on Create Manikin -- a manikin will appear attached to your laser pointer.
-
Click once to place the manikin in the environment.
-
Click a second time to define the manikin's orientation.
The manikin is now created.
Edit a Manikin in VR
You can select any existing manikin -- either directly in VR or from the Manikin List on your tablet to edit its customization options.
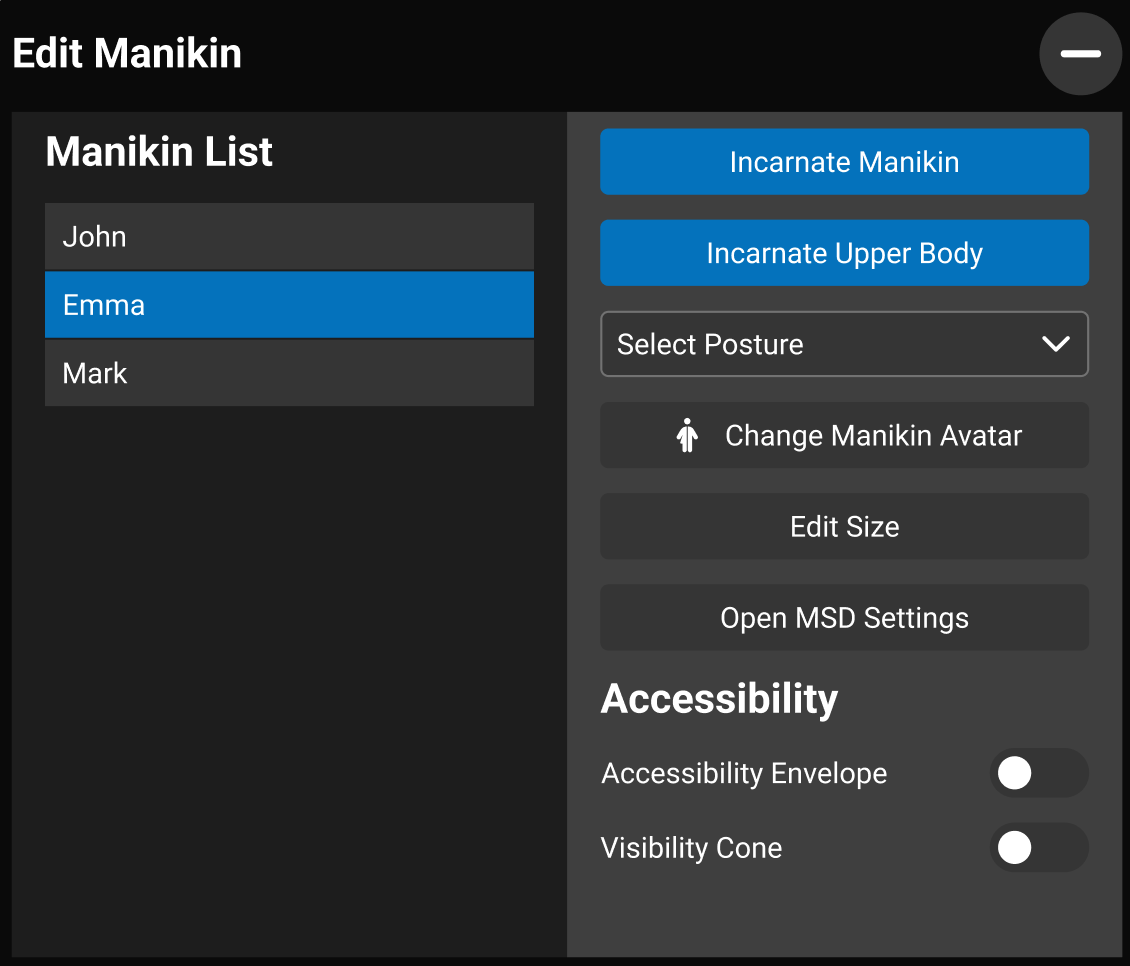
|
Incarnate Manikin |
Requires body tracking. Project yourself into a manikin — it mirrors your movements. Fast Calibration handles size differences. . While you incarnate the manikin, you can move freely to assume any wanted pose. |
|
Incarnate Upper Body |
An easier way to embody a manikin is to project yourself into its upper body. This allows you to adopt its position without physically moving—for example, if the manikin is lying down, you’ll experience the same posture without needing to lie down yourself. |
|
Select Posture |
By default, the Manikin will appear in a normal standing position, you can use the combo box to change the posture for one of the posture presets. |
|
Change Manikin Avatar |
Select any manikin that is on your Manikin's Library |
|
Edit Size |
You can edit any manikin's Height and Arm's reach |
|
Open MSD Settings |
Find all MSD parameters (according to RULA). |
|
Accessibility Enveloppe |
shows an area surrounding the manikin where the manikin's arms can reach |
|
Visibility Cone |
When active, a light will show and paint everything that is on the manikin's visual field |
Note: To incarnate a manikn, we strongly recommend completing a Body Calibration beforehand.
When a manikin is selected, you have access to several actions in the side panel.
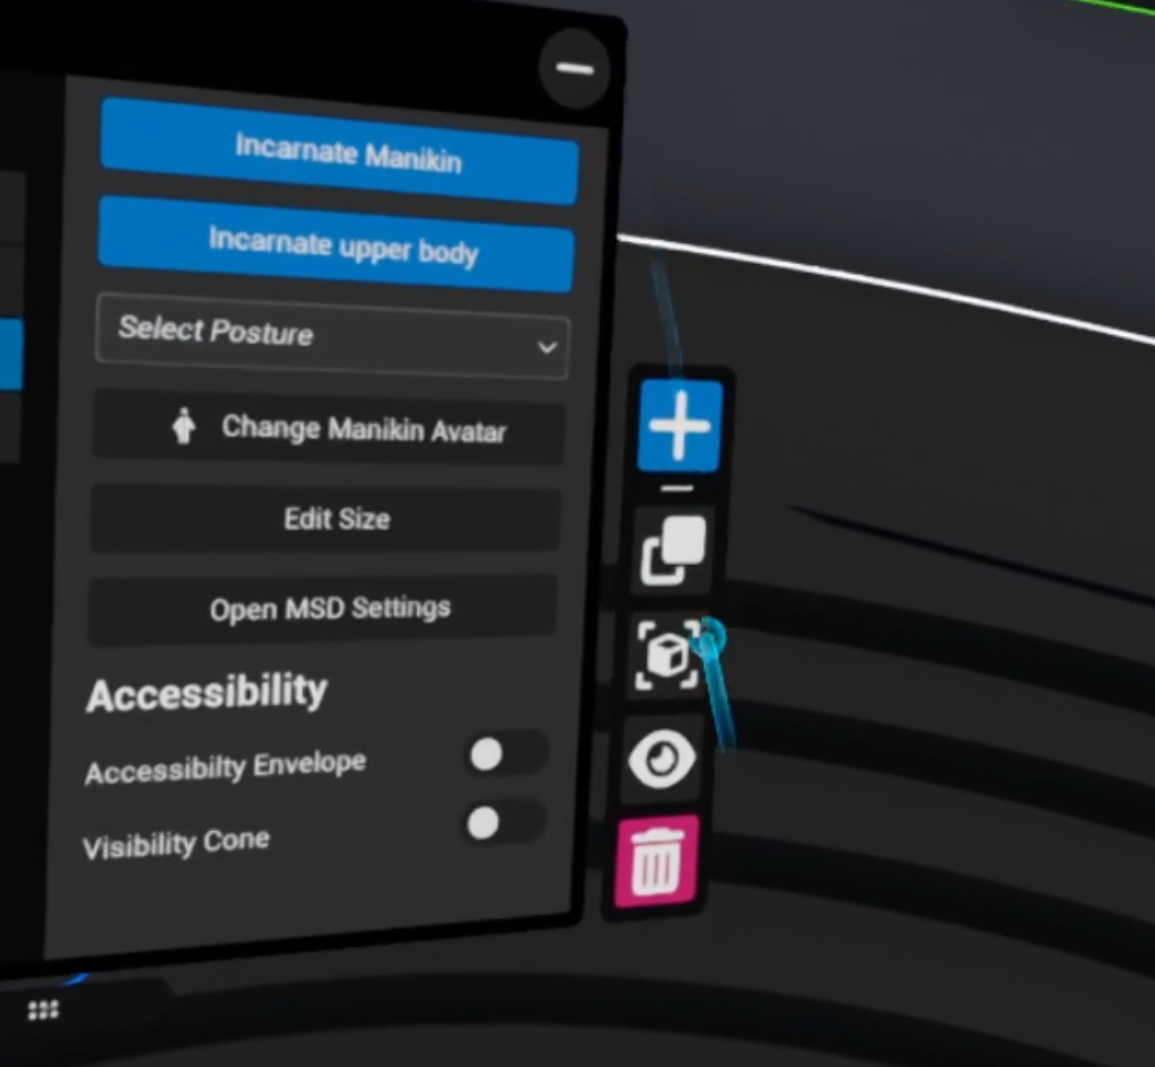

Create Manikin |
Clicking this button is a shortcut to the create a new Manikin. |

Duplicate Manikin |
Clicking this button would hide your tablet and spawn an exact copy of the manikin selected into your laser pointer. You can afterwards place the new manikin in any position in space. |

Focus |
This button will focus on the selected manikin. |

Hide / Show |
This button will hide (or show depending on the visibility) on the selected manikin. |

Delete |
This button will delete the selected manikin. |
Tips
-
Use the Snap To Actor effector state to attach tools or objects to a manikin's hand for realistic operation simulations.
-
You can press M on your keyboard in Desktop mode to quickly enter manikin edit mode.
Avatars and MetaHuman
SkyReal provides a range of avatar options for your manikins, from simple robot skins to highly realistic MetaHuman characters. You can select and customize these avatars to best fit your simulation and ergonomic study needs.
Robot Avatars
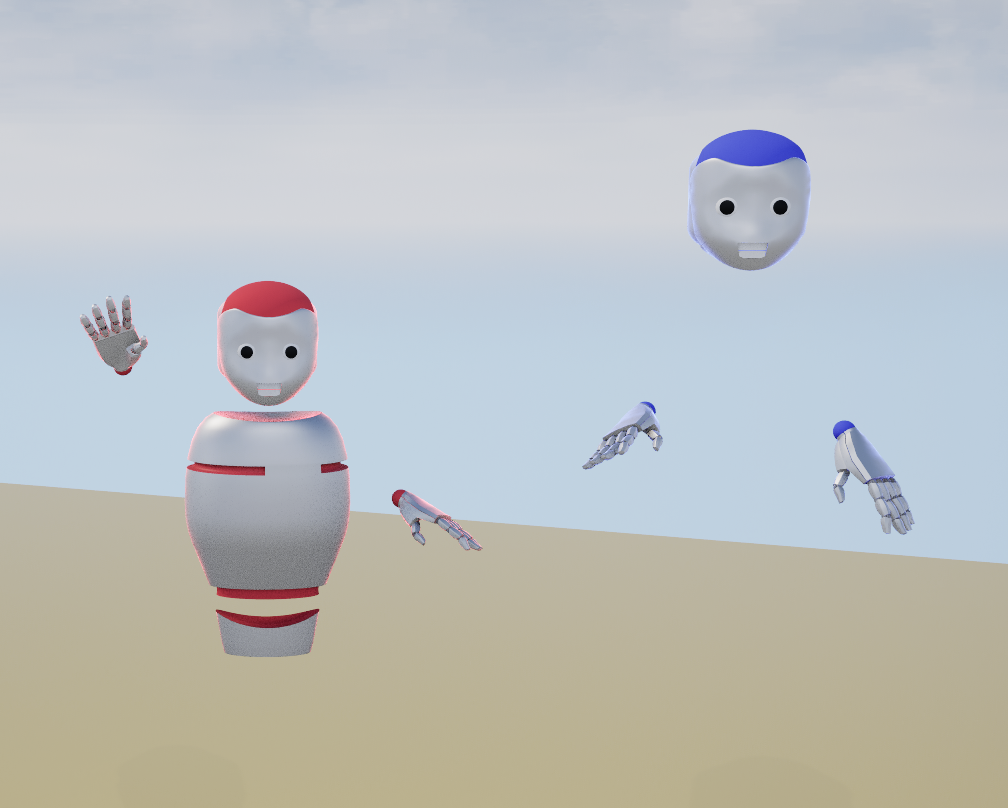
SkyReal offers two types of robot skins by default. These are available as personal avatar options for your VR representation.
Manikin MetaHumans
SkyReal's manikin avatars are created with MetaHuman from Unreal Engine (https://www.metahuman.com/download)
SkyReal offers a selection of different avatars, each with unique characteristics such as name, height, body type, gender, and a particular outfit
Standard Avatars

Worker Avatars
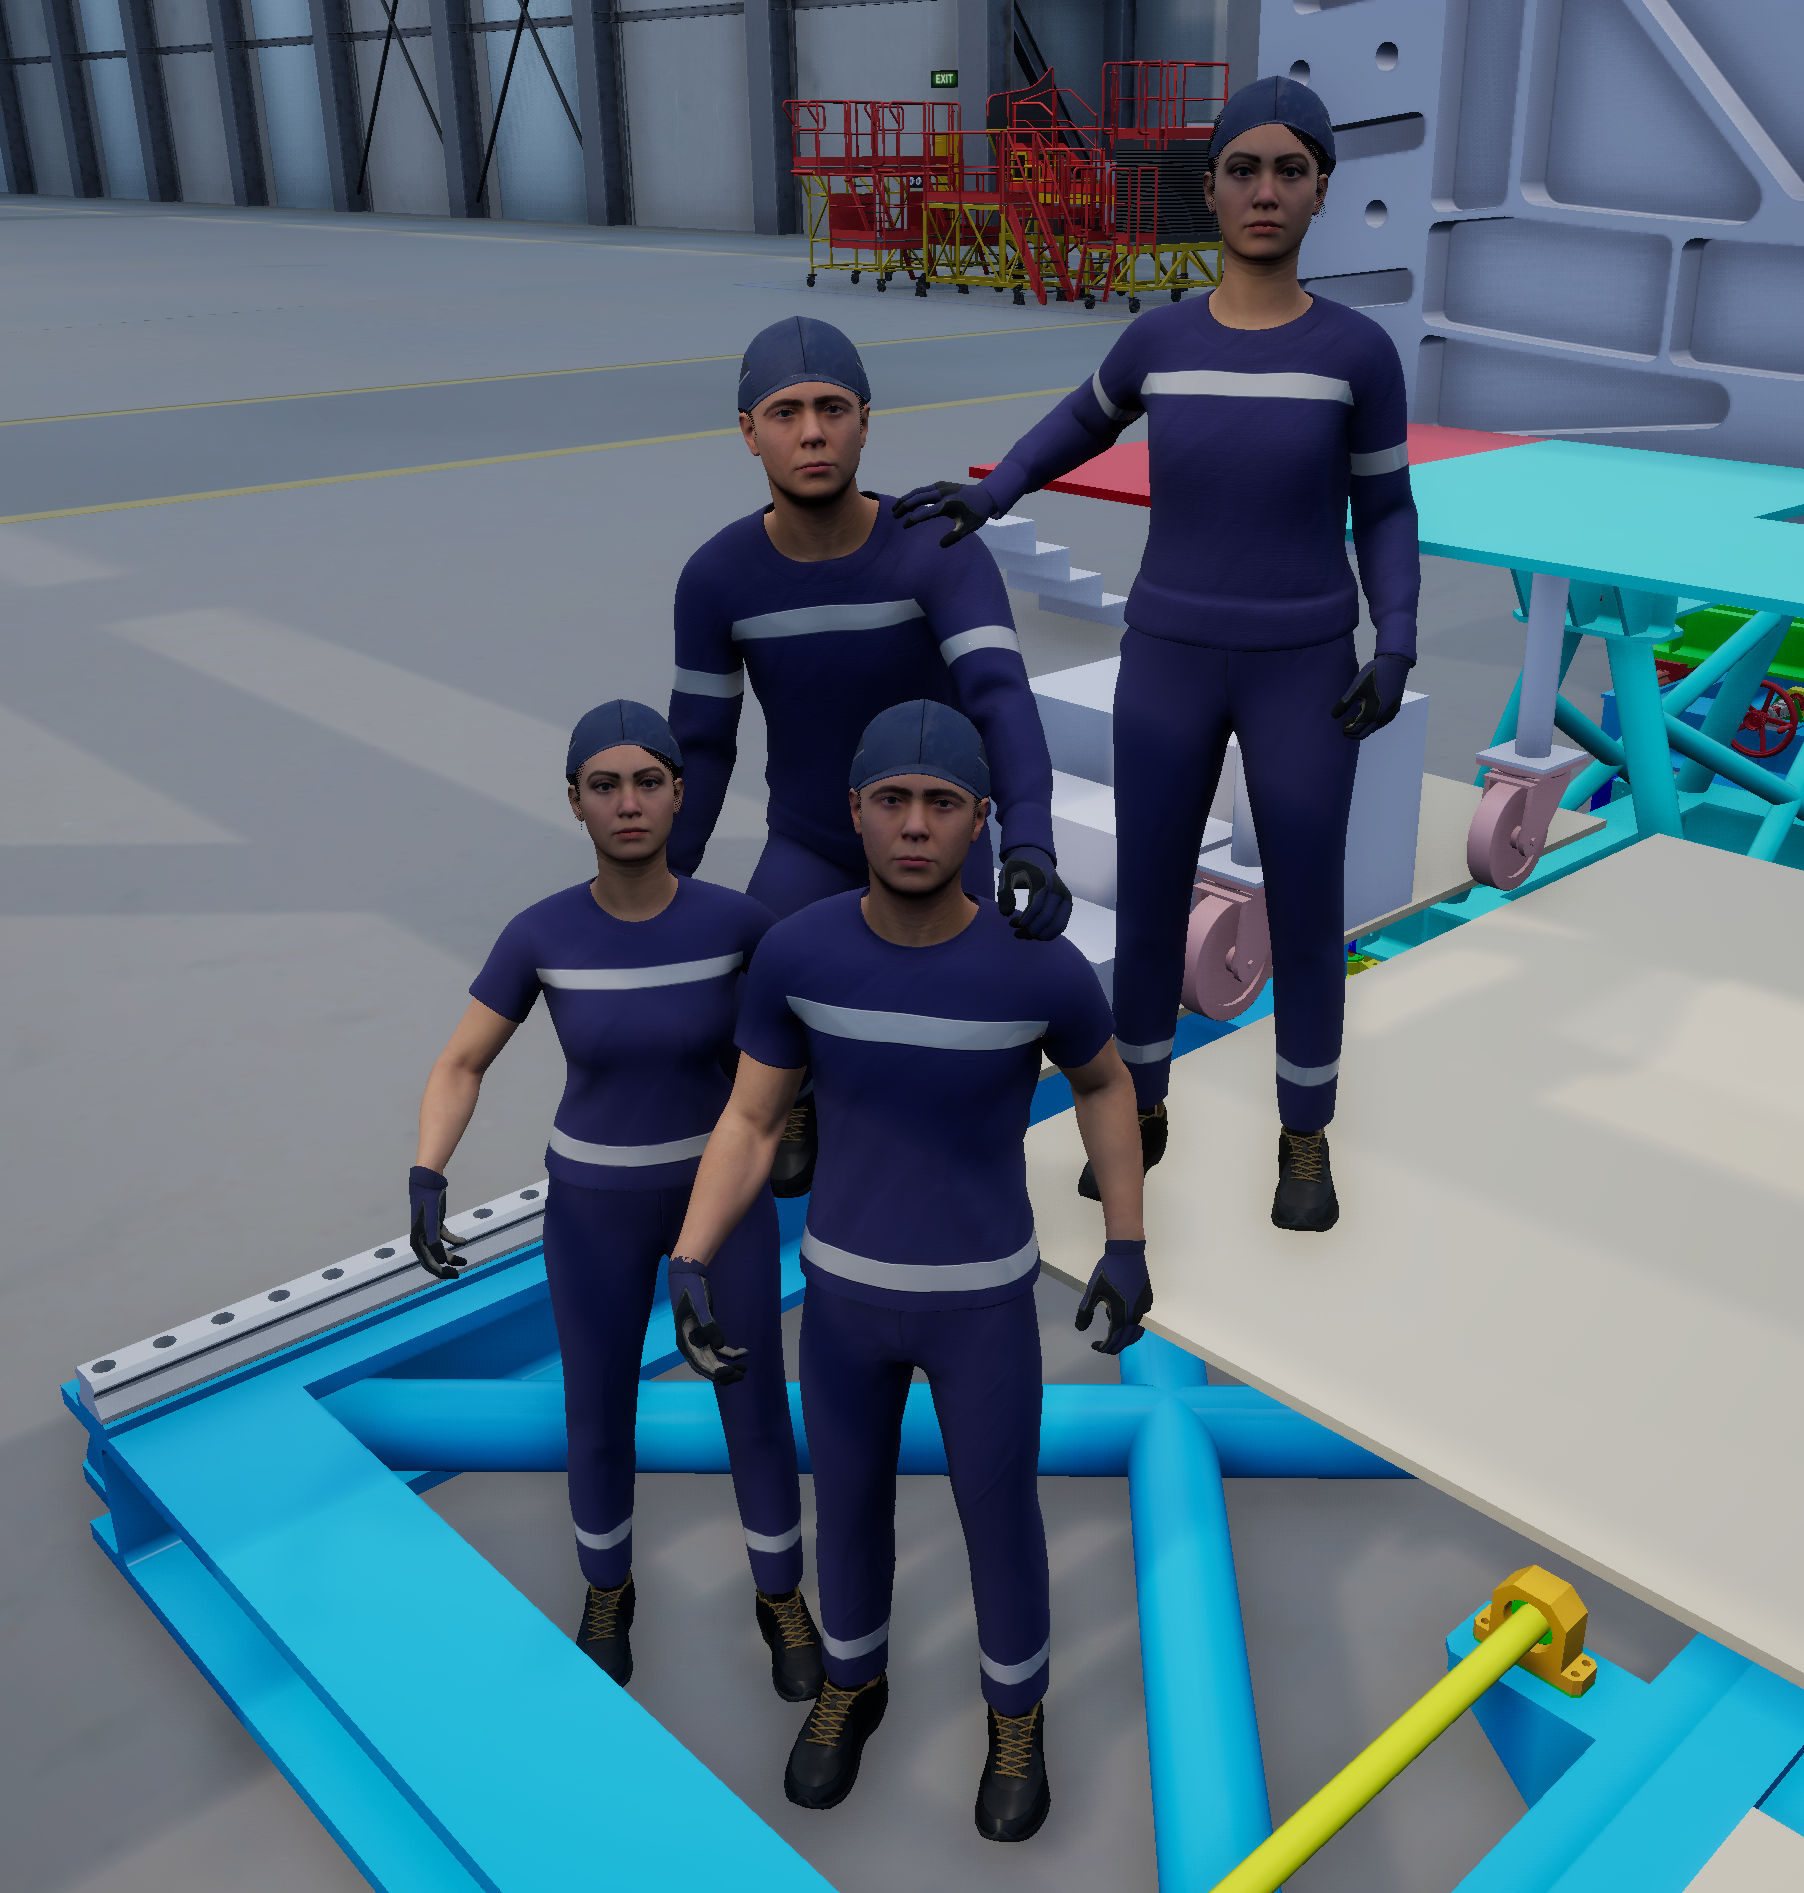
By default, you will find the “Workers” avatar style, as well as the MSD Avatar, which is ideal for creating, analyzing, and reproducing ergonomic postures.
Keep in mind that each avatar has its own height and body proportions.
You can download more manikins from the marketplace, each pack has several manikins
Available manikin extensions include:
-
Basics – MetaHumans representing standard human avatars
-
Firefighter – includes two avatars dressed as firefighters
-
Military – avatars based on specific human percentiles
-
Astronaut – our latest addition, featuring an avatar with astronaut gear
Tips
-
Choose a worker avatar with PPE when simulating industrial or manufacturing scenarios for a more realistic experience.
-
You can customize the logo on worker avatars to match your company branding through the Local User Settings.
-
When performing ergonomic studies, select an avatar whose height and body type closely match the target operator for the most accurate results.
-
The MSD avatar (see MSD Analysis) is a specialized option that overlays RULA score colors -- use it when you need real-time ergonomic feedback on posture.