
Manikin Settings
For any manikin -or for yourself- you can activate the following settings in both VR and Desktop modes.
Size
Manikin Height
Every manikin has its own established height. If you need to set a particular height, you can activate this option by clicking the switch button to set up a new manikin height.
Override Arm's Reach
Every manikin has its own established arm's distance (measured from wrist to wrist). If you need to set a particular arm's distance, you can activate this option by clicking the switch button to set up a new one.
Posture
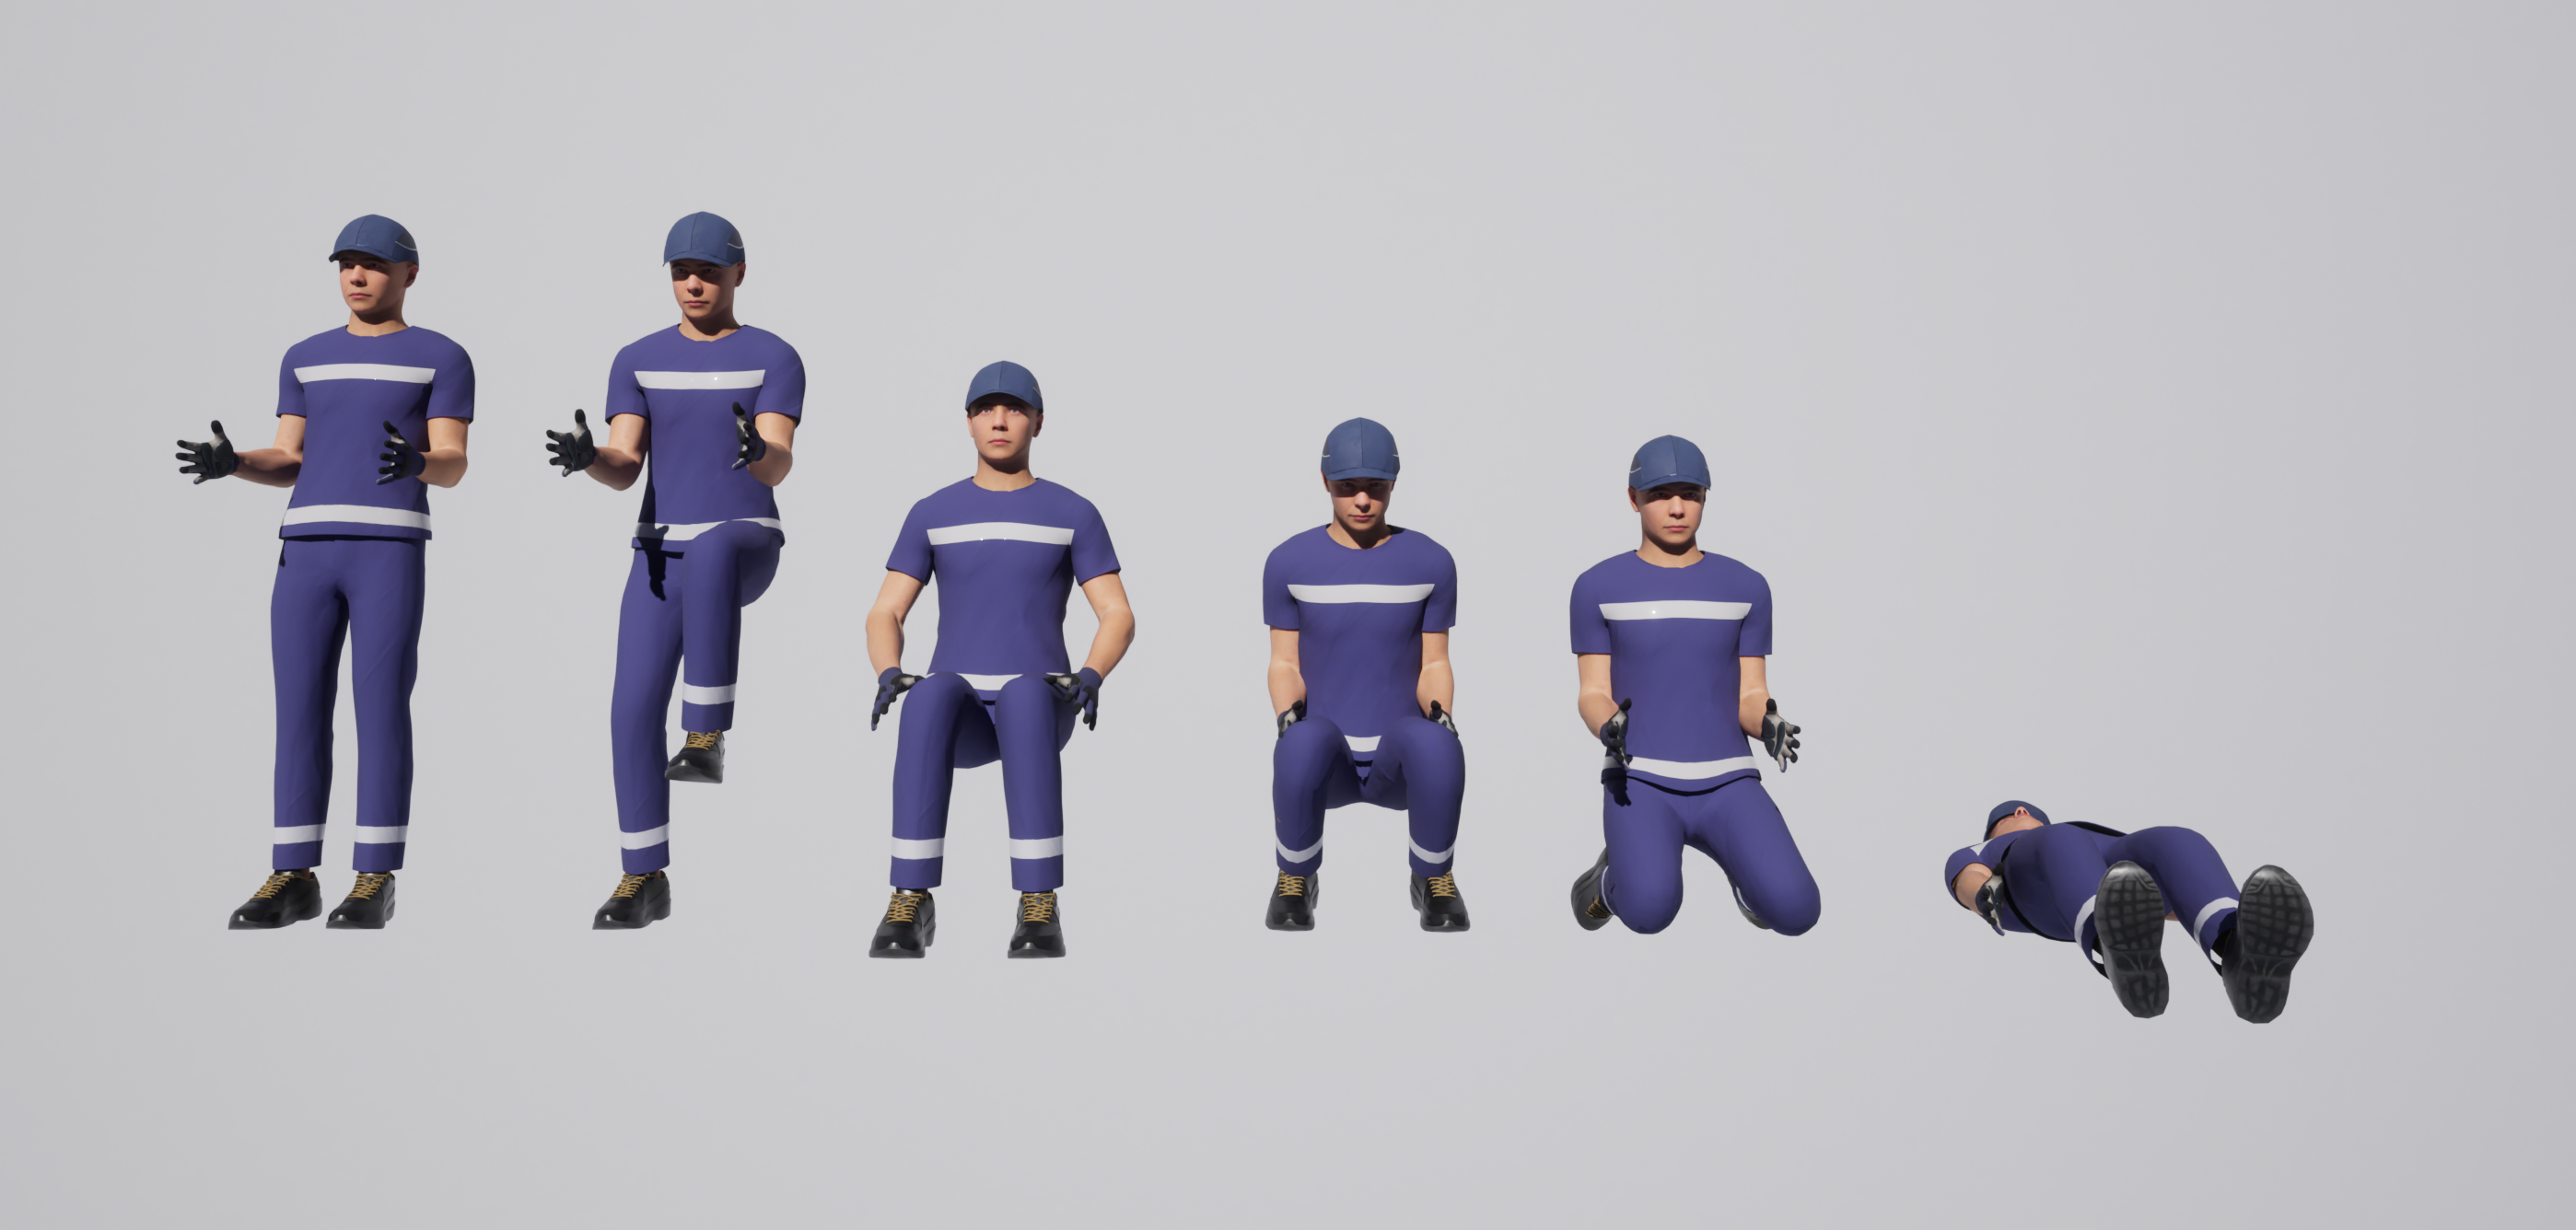
By default, the manikin will appear in a normal standing position. You can use the [dropdown] to change the posture to one of the available presets.
Accessibility
For any manikin, you can activate the following accessibility settings.
Vision Cone
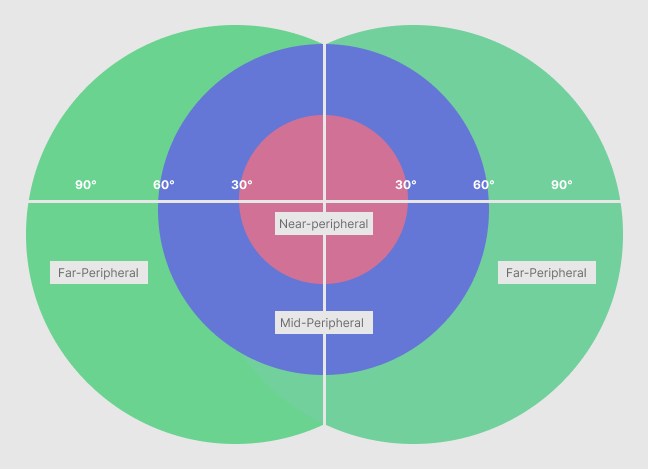
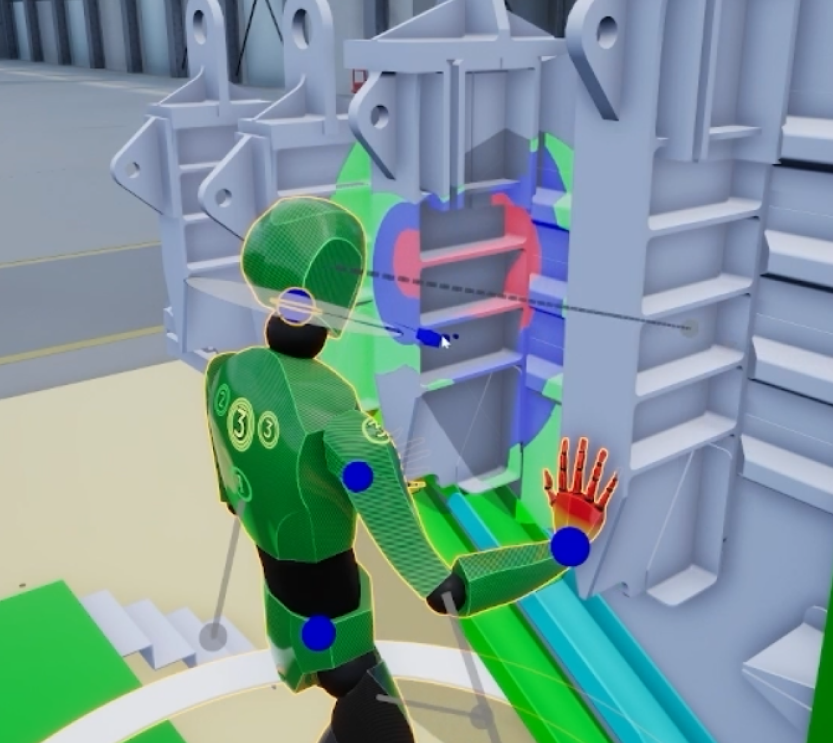
When active, a light will illuminate and highlight everything that is within the manikin's visual field.
Accessibility Envelope
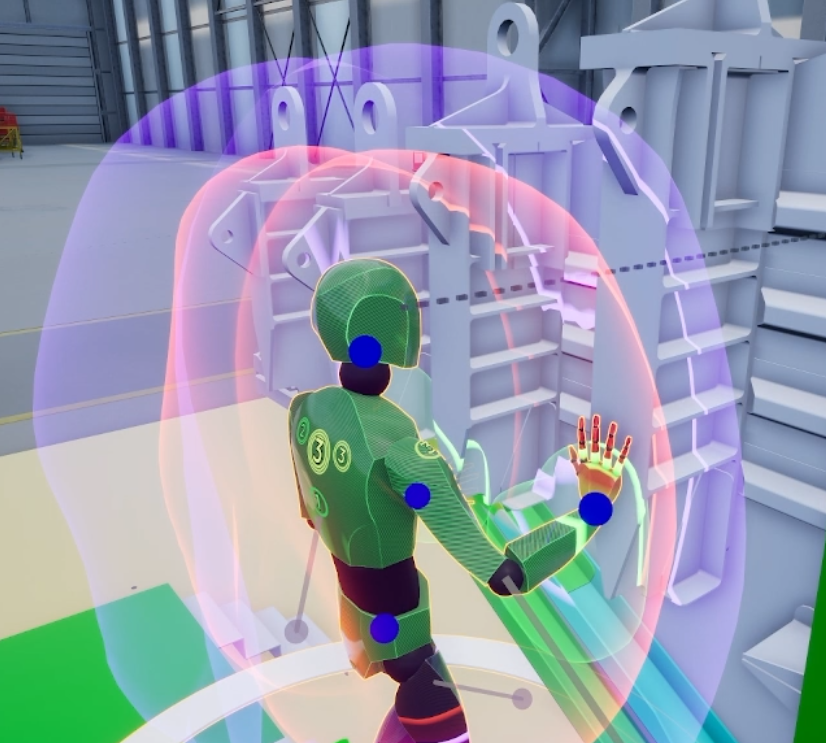
When active, this feature displays an area surrounding the manikin that represents where the manikin's arms can reach.
Effectors
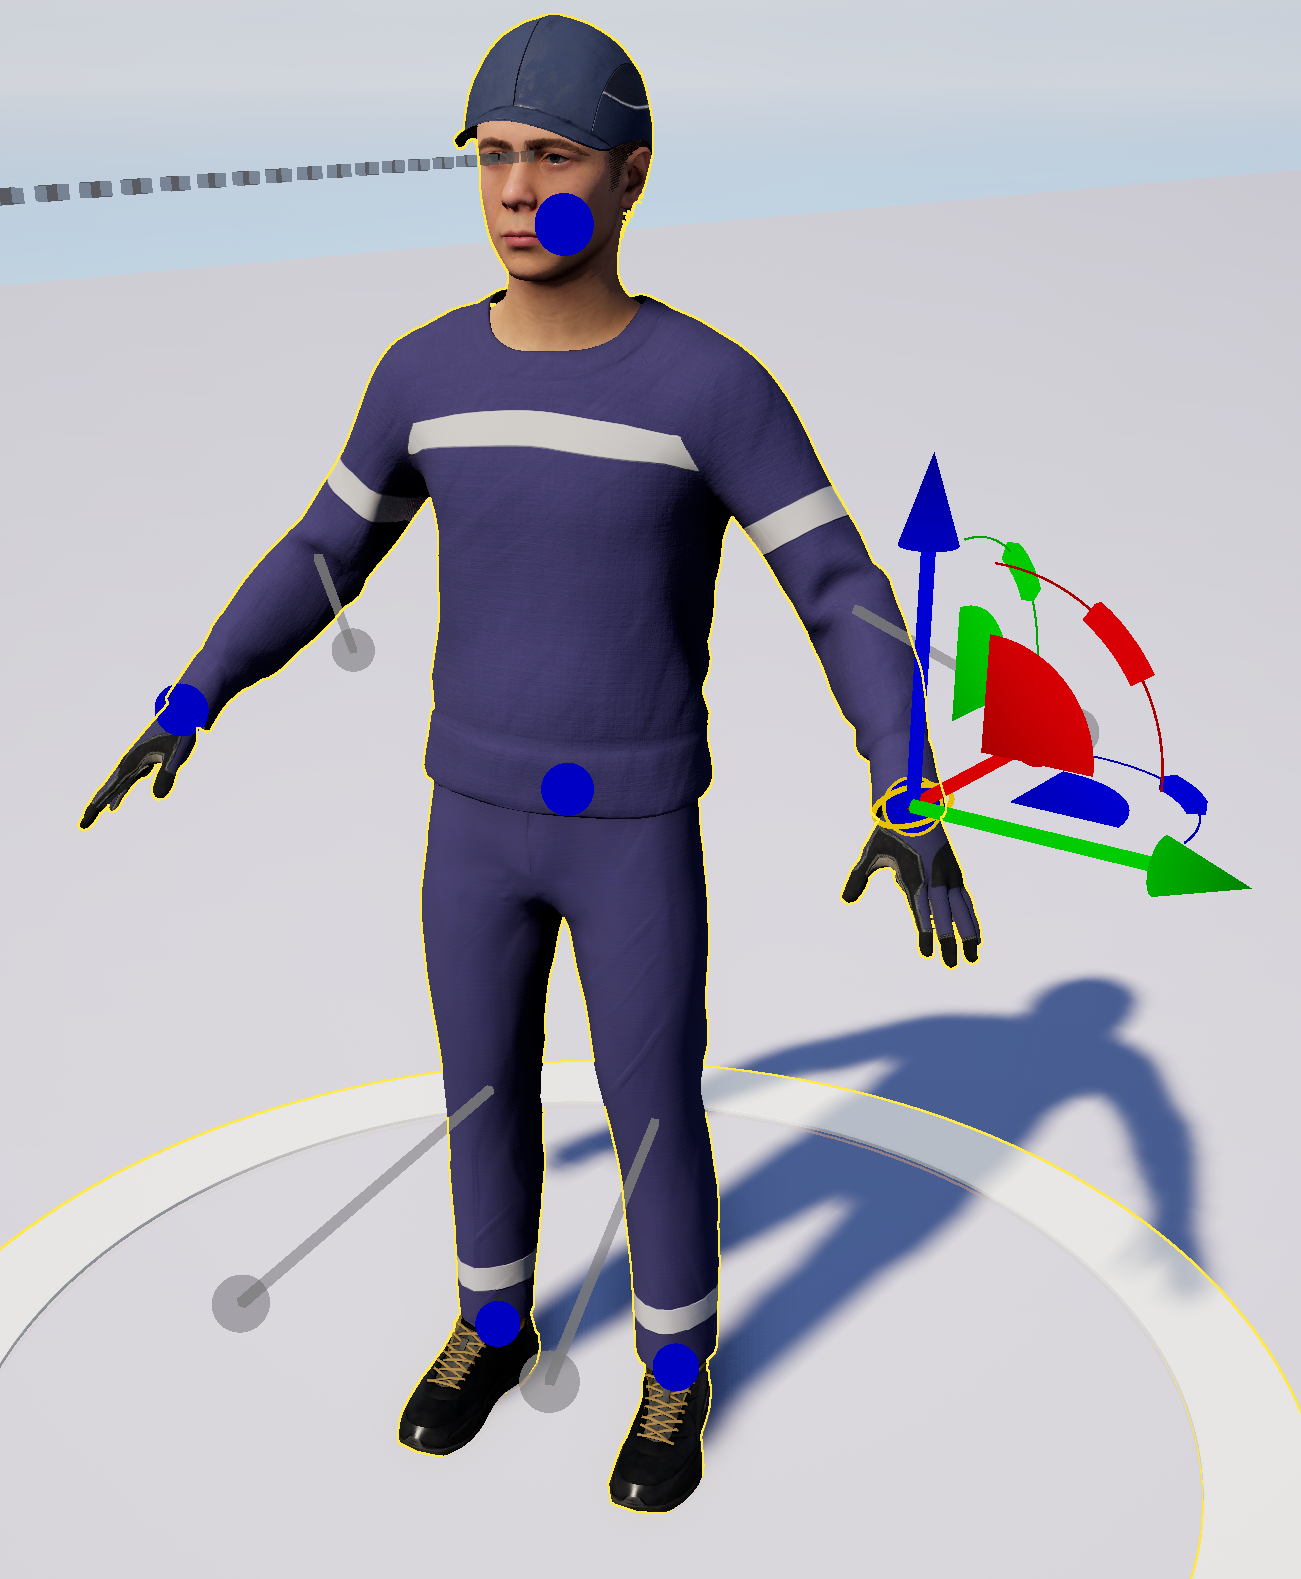
When a manikin is selected, you can see all its effectors represented by blue spheres. These effectors can be selected, moved, or rotated with your laser pointer (VR) or mouse (Desktop).
In VR, to quickly move an effector, select it with the trigger button and, while holding the button, place the effector in the desired position. You can also rotate the effector by moving your hand accordingly.
You can edit each effector's options by clicking on it.
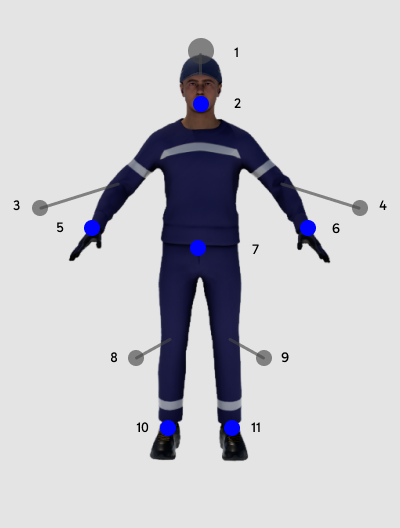
Effector List
-
Eyes
-
Head
-
Elbow Right
-
Elbow Left
-
Hand Right
-
Hand Left
-
Pelvis
-
Knee Right
-
Knee Left
-
Foot Right
-
Foot Left
Effector States
Each effector can have one of six different states:
-
Free: The effector's position and rotation are controlled by you. When hand effectors are selected, this option activates the Effector Options and Point Effector To buttons (see below).
-
Simulated: The effector is controlled by the system. It will follow any movement linked to it, except direct user input.
-
Snap To Actor: When selected, you can pick an object to attach to the effector. If the object moves, the effector will follow. If the effector moves, the object remains static.
-
Locked Local: The effector is frozen locally. If you move the manikin, the effector will not follow and will stay frozen in its local position.
-
Locked World: The effector is frozen in its world position and rotation. If the manikin moves, the effector will stay in place.
-
Disable: The effector is disabled (it turns gray) and returns to its default position.
Point Effector To
When clicked, you can select any object in the scene, and the effector will be linked to it.
Effector Options
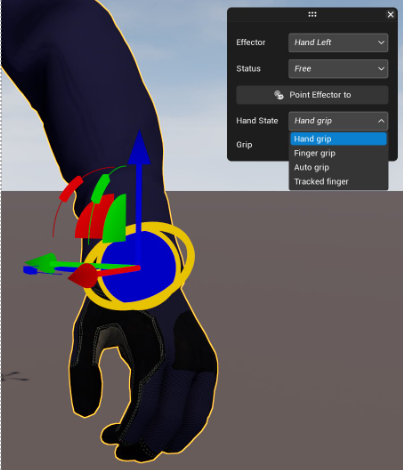
This feature exists for hand effectors only.
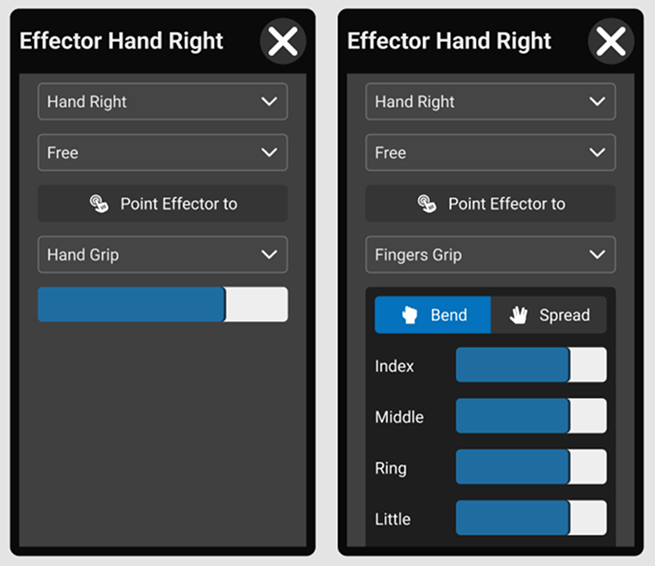
It opens the hand effector options, including Hand Grip and Fingers Grip, where you can open, close, or spread the manikin's hand, or open, close, or spread each finger individually.
The third option, Auto Grip, allows the hand to assume a particular position when linked to an object with predefined sockets.
Tips
-
Use the Vision Cone to verify that an operator can see critical controls or displays from a given posture.
-
The Accessibility Envelope is useful for checking whether tools and components are within arm's reach of a manikin at a workstation.
-
Combine effector states (such as Snap To Actor) with hand grip options to simulate realistic tool handling.