XR Center uses a server/client architecture. It is recommended to install it on appropriate server infrastructure. However, for local use, all packages can be installed on a single machine.
This procedure describes a standard single-machine installation. The procedure for complex (multi-machine) infrastructures is similar but spread across different machines.
Software Prerequisites
-
Unreal Engine 5.7 - for preparation agents only
-
PostgreSQL 18 - (optional) embedded into XR Center by default, can also be installed manually as a service.
Hardware Minimal Prerequisites
-
SSD: 128 GB + blob storage if installed on the same machine
-
CPU: 4 cores, 2.8 GHz
-
RAM: 16 GB
If your Prep Agent runs on the same machine:
-
CPU: 8 cores, 2.8 GHz
-
RAM: 64 GB
Installation Steps
Step 1 - Execute Server Package installers
The server package is composed of the following folders:
-
Software:
-
XR Center
-
Generic Agent
-
SkrPlugins
-
-
Marketplace
-
SkyrealVR extensions
-
Scripts
-
Start with the installation of XR Center and Generic Agent.
-
Choose the install location
-
Finish the setup
Step 2 - Start XR Center
License setup
To request a license, you need the fingerprint of the machine running XR Center.
-
Open a cmd and go to the installation path
cd "C:\Program Files\Skr\XRCenter" -
Get the fingerprint
Skr.XRCenter.exe license fingerprint
Then you can request the license file to the Skyreal support team ([email protected])
Place your license file (*.skrtoken) into the license folder :
C:\ProgramData\Skr\xrcenter\licenses
Create the Windows service
-
Execute a CMD or Powershell console with Administrator rights.
-
Go to the installation path
cd "C:\Program Files\Skr\XRCenter" -
Install the service
Skr.XRCenter.exe service install -
Start the service
Skr.XRCenter.exe service start
Step 3 - Configure XR Center
Open a web browser and connect to the XR Center web page: https://localhost:9228
Enter the default credentials:
-
user: sysadmin
-
pwd: Sys@dm1n
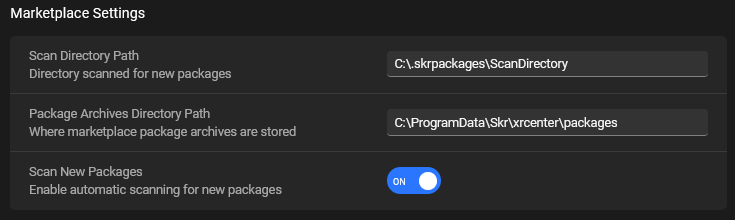
Marketplace settings
-
Go to the XR Center Settings tab
-
Edit the Scan Directory Path and the Package Archives Directory Path if needed (for instance if you want to move it to another drive)
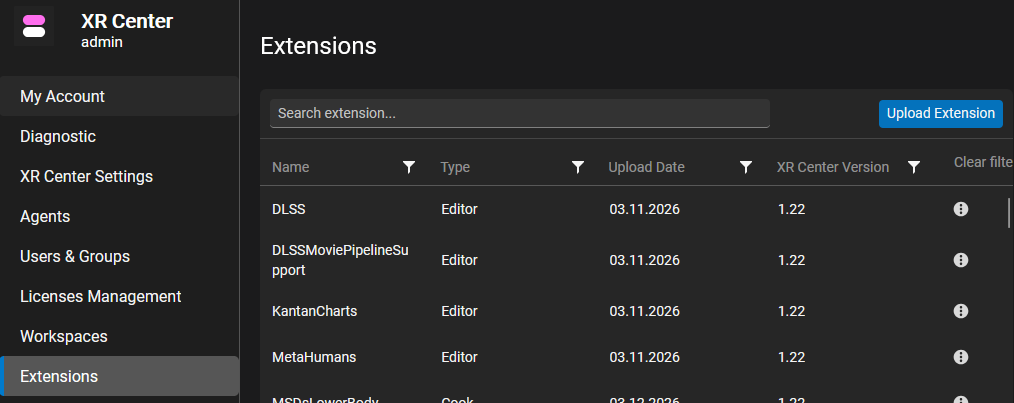
Install extensions
-
Go to the Extensions tab
-
Click the Upload Extension button
-
Check Multiple packages option

-
Drag&Drop the SkrPlugins and the extensions you want to install
-
Upload
(Optional) Manual extensions install
It is possible the extension upload in the web view is blocked by IT restrictions.
In this case, a manual install is possible:
-
Place your extensions (*.skrmkt files) in the Scan Directory defined before
C:\.skrpackages\ScanDirectory -
Create a file called “.ToScan” in this same directory.
Check that the file format is not hidden in Windows Explorer. This file must be a “.ToScan” file, not a “.ToScan.txt”.
XR Center should destroy the .ToScan file and store the extensions.
It is over when the Scan directory is empty.
Step 4 - Start the Generic Agent
-
Execute a CMD or Powershell console with Administrator rights.
-
Go to the installation path
cd "C:\Program Files\Skr\GenericAgent" -
Install the service
Skr.GenericAgent.exe service install -
Start the service
Skr.GenericAgent.exe service start
Step 5 - Configure Generic Agent
-
Connect to the XR Center web page: https://localhost:9228
-
Open the Agent tab
-
Enable the Agent
-
Click on the agent status

-
Activate and Save
-
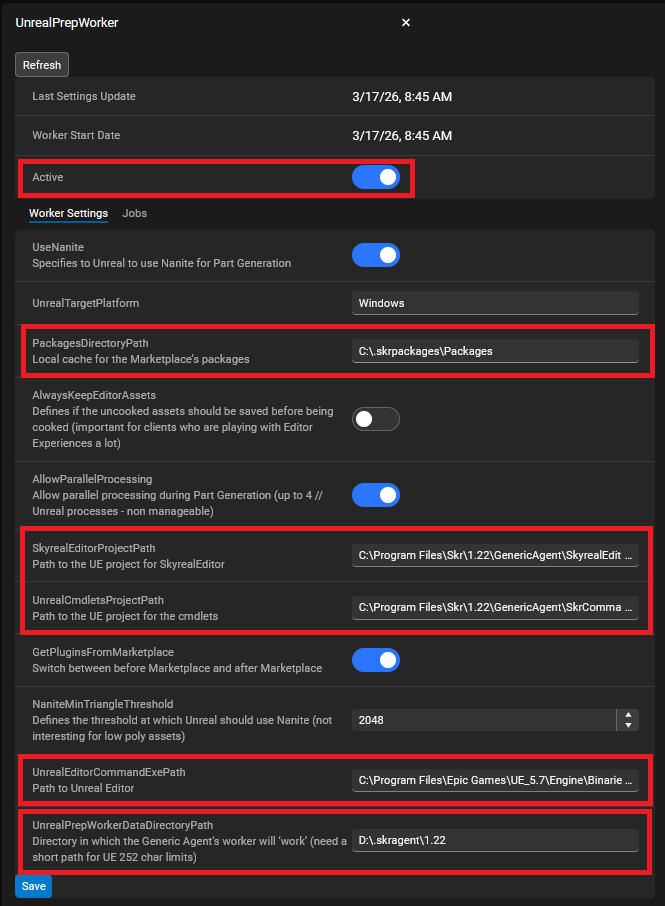
Configure UnrealPrepWorker
-
Activate the worker
-
Check that the following path are correctly setup:
-
SkyrealEditorProjectPath
-
UnrealCmdletsProjectPath
-
UnrealEditorCommandExePath
-
-
Optionally, change the data locations:
-
PackagesDirectoryPath
-
UnrealPrepWorkerDataDirectoryPath
-
-
Save
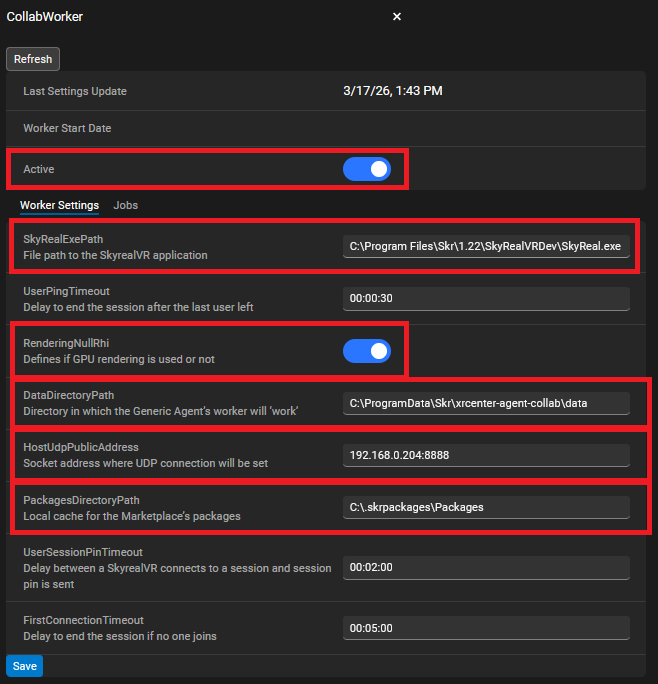
Configure CollabWorker
-
Activate the worker
-
Check that the following path is correctly setup:
-
SkyrealEditorProjectPath (SkyrealVR must be installed from the Client package)
-
-
Enable RenderingNullRhi if no GPU on the machine
-
Update the HostUdpPublicAddress with the IP or alias of the machine
-
Optionally, change the data locations:
-
DataDirectoryPath
-
PackagesDirectoryPath
-
-
Save
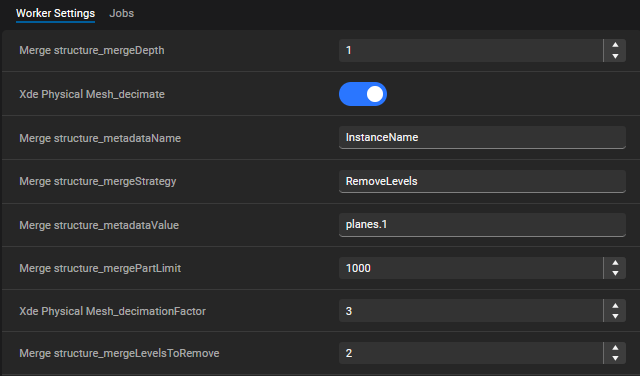
Configure ForgeAgentP3DCContextWorker
-
Activate the worker
-
Optionally, change the locations:

The message “job Merge structure was not found” simply means you have no script yet.
-
Unzip the scripts from the Server package in the P3DCContext Scripts Path
-
You will have to restart the GenericAgent services to access the new scripts settings.
Step 6 — Install Deck (Client)
Install Deck on each user workstation. See the Deck installation page for details.
Deck is the front-end client application. It handles:
-
Connection to XR Center
-
Upload of CAD files to the preparation cluster
-
Creation of experiences
-
Launching of products linked to an experience (Skyreal VR, Product Explorer, Unreal Engine)
Deck Software Prerequisites:
-
Unreal Engine Prerequisites (installed automatically at first Skyreal VR launch, or manually from
[Skyreal Install Directory]\\Engine\\Extras\\Redist\\en-us\\vc_redist.x64.exe).
Deck Installation: Install using the provided installer. Your license is managed by XR Center.
Advanced Configuration
How to Edit Config Files
XR Center configuration file can be manually edited:
C:\\ProgramData\\Skydea\\xrcenter\\xrcenter.json
These JSON files must use valid JSON syntax. Use an online JSON validator if you are unsure.
The corresponding services must be restarted for changes to take effect.
Common mistakes:
-
Brackets not closed
-
Forgotten or extra comma
-
Backslashes not escaped (for paths, duplicate backslashes like
\\\\)
XR Center Configuration Options
-
Change logs directory:
"LogDirectoryPath": "" -
Change blob storage location: Modify
"BlobDirectoryPath"in the"DataStore"section -
Customize ports: Modify the
"Kestrel">"Endpoints"section -
Add plugins: Add plugin names to the
"OptionalPlugins"array
Deck Advanced Configuration
Edit Deck\\deck.json:
-
Local cache path:
"DataDirectoryPath": "" -
Editor data path:
"EditorDataDirectoryPath": ""