Overview
Note: This feature requires a CAD Forge License. See the User Rights Management policy for more information.
CAD Forge allows you to import and store your CAD files in a centralized 3D Data Library, shared across your entire workspace. It supports a wide range of CAD formats, from CATIA and SOLIDWORKS to STEP, AutoCAD, IFC, and many more, making it compatible with virtually any CAD pipeline.
Once imported, your 3D data becomes available to all experiences within that workspace, eliminating the need to re-import the same files for each project and making it easy to reuse and share CAD assets across teams and experiences.
Each CAD file comes with configurable visibility permissions, allowing you to control access at the user or group level — whether as a Member, Contributor, or Owner. Additionally, every CAD file goes through a preparation pipeline with dedicated statuses, keeping you informed of its availability and readiness for use in VR.
Open CAD Forge
To open CAD forge, open your workspace and then click on Open CAD Forge. In the right pannel you have the list of all the CAD in your Workspace, and in the left pannel you have access to the selected CAD Product Structure.
Import your CAD
Note: This feature has restricted rights and requires a CAD Forge License with the 3D import right. See the User Rights Management policy for more information.
Before you can visualize your CAD in VR, you need to import it into CAD Forge's 3D Data Library. The import process converts your CAD files into Unreal Engine 3D assets that can be used in Skyreal VR.
How to Import a CAD File ?
In the 3D Data Library, you can import CAD files from all major formats.
-
In CAD Forge, click the Import CAD button to open the import dialog.
-
Select your CAD file or drag and drop it into the designated area.
-
Configure your import settings and click Next.
-
Set your CAD visibility permissions.
-
Click Start Uploading.
Depending on the size of your CAD, this operation may take some time. The import automatically launches two background tasks: parts import and parts preparation.
Important: Do not close the application while the import is running.
Supported Formats
|
Names |
Extentions |
|---|---|
|
CATIA V4 - V5 - DELMIA |
.CATPart .CATProduct .CGR .CATProcess .model |
|
CATIA V6 / 3DExperience |
.3dxml |
|
SIEMENS Product File |
.jt .plmxml |
|
Creo / Pro Engineer |
.prt .asm |
|
IFC |
.ifc |
|
RHINO |
.3dm |
|
SOLIDWORKS |
.sldprt .sldasm |
|
STEP |
.stp .step |
|
STL / Stereo-litography |
.stl |
|
Inventor |
.iam .ipt |
|
Parasolid |
.x_t .x_b .p_b .p_t |
|
AutoCAD |
.dwg |
|
Microstation |
.dgn |
|
Naviswork |
.nwd |
|
ACIS |
.dwg |
|
Others |
.igs .iges .vda |
|
FBX |
fbx |
CAD Visibility
You can manage your CAD's visibility to control access:
|
Role |
Permissions |
|---|---|
|
Member |
Can view the CAD in the 3D library but cannot delete it or change settings |
|
Contributor |
Can view the CAD in the 3D library and edit its settings |
|
Owner |
Has full control, including the ability to delete the CAD |
When you import a CAD, you are automatically designated as its Owner.
Import Settings
|
Setting |
Description |
Recommendation |
|---|---|---|
|
SAG |
Surface Approximation tolerance for tessellation |
— |
|
Deduplicate Instances |
Deletes duplicated instances (same parts at the same position) |
— |
|
Use Multi-Process Import |
Enables spatial import parallelization (beta) |
May lower performance |
|
Use Legacy Mode |
Matches SkyPrep settings for improved stability |
Try if standard import fails |
|
Discard Visu PMI Processing |
Discards product manufacturing information (faster, especially for CATIA V5) |
Recommended |
|
Discard Import Edges (.jt only) |
Discards visualization data for edges, improves performance (JT format only) |
Recommended |
3D Data Status
Your imported CAD files can have the following statuses:
Importing CAD
When you just start the import of a CAD, it doesn’t appear in your 3D Data Librery first, but a background task is launched to import your CAD in XR Center. XR Center is loading the product structure and 3D data. Once complete, a preparation task is automatically launched.
CAD Not Matching Your Unreal Version
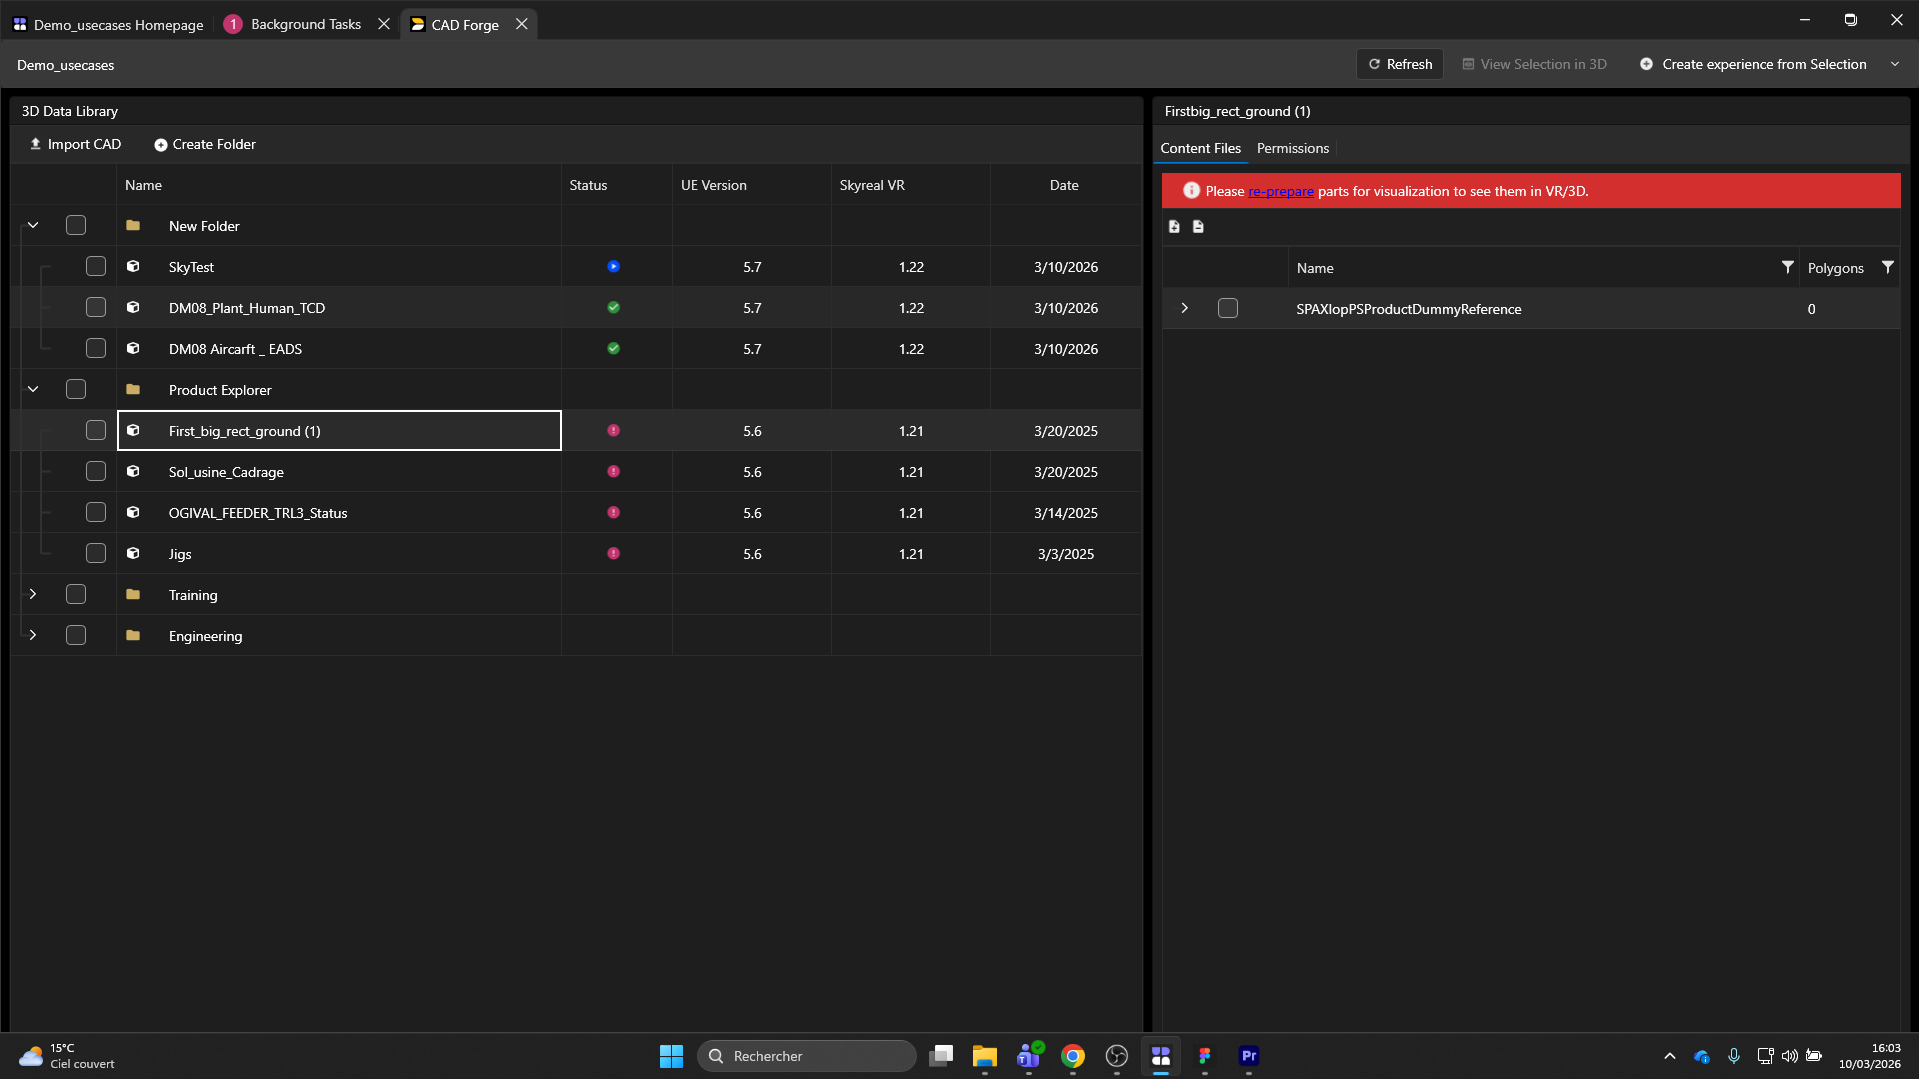
A red banner indicates that your 3D Unreal assets are not up to date with your Unreal Engine version. While the product structure is still loaded, you cannot use the 3D data in VR or in the 3D viewer. To fix this, click the Re-prepare button in the banner or right-click your CAD and select Reprepare.
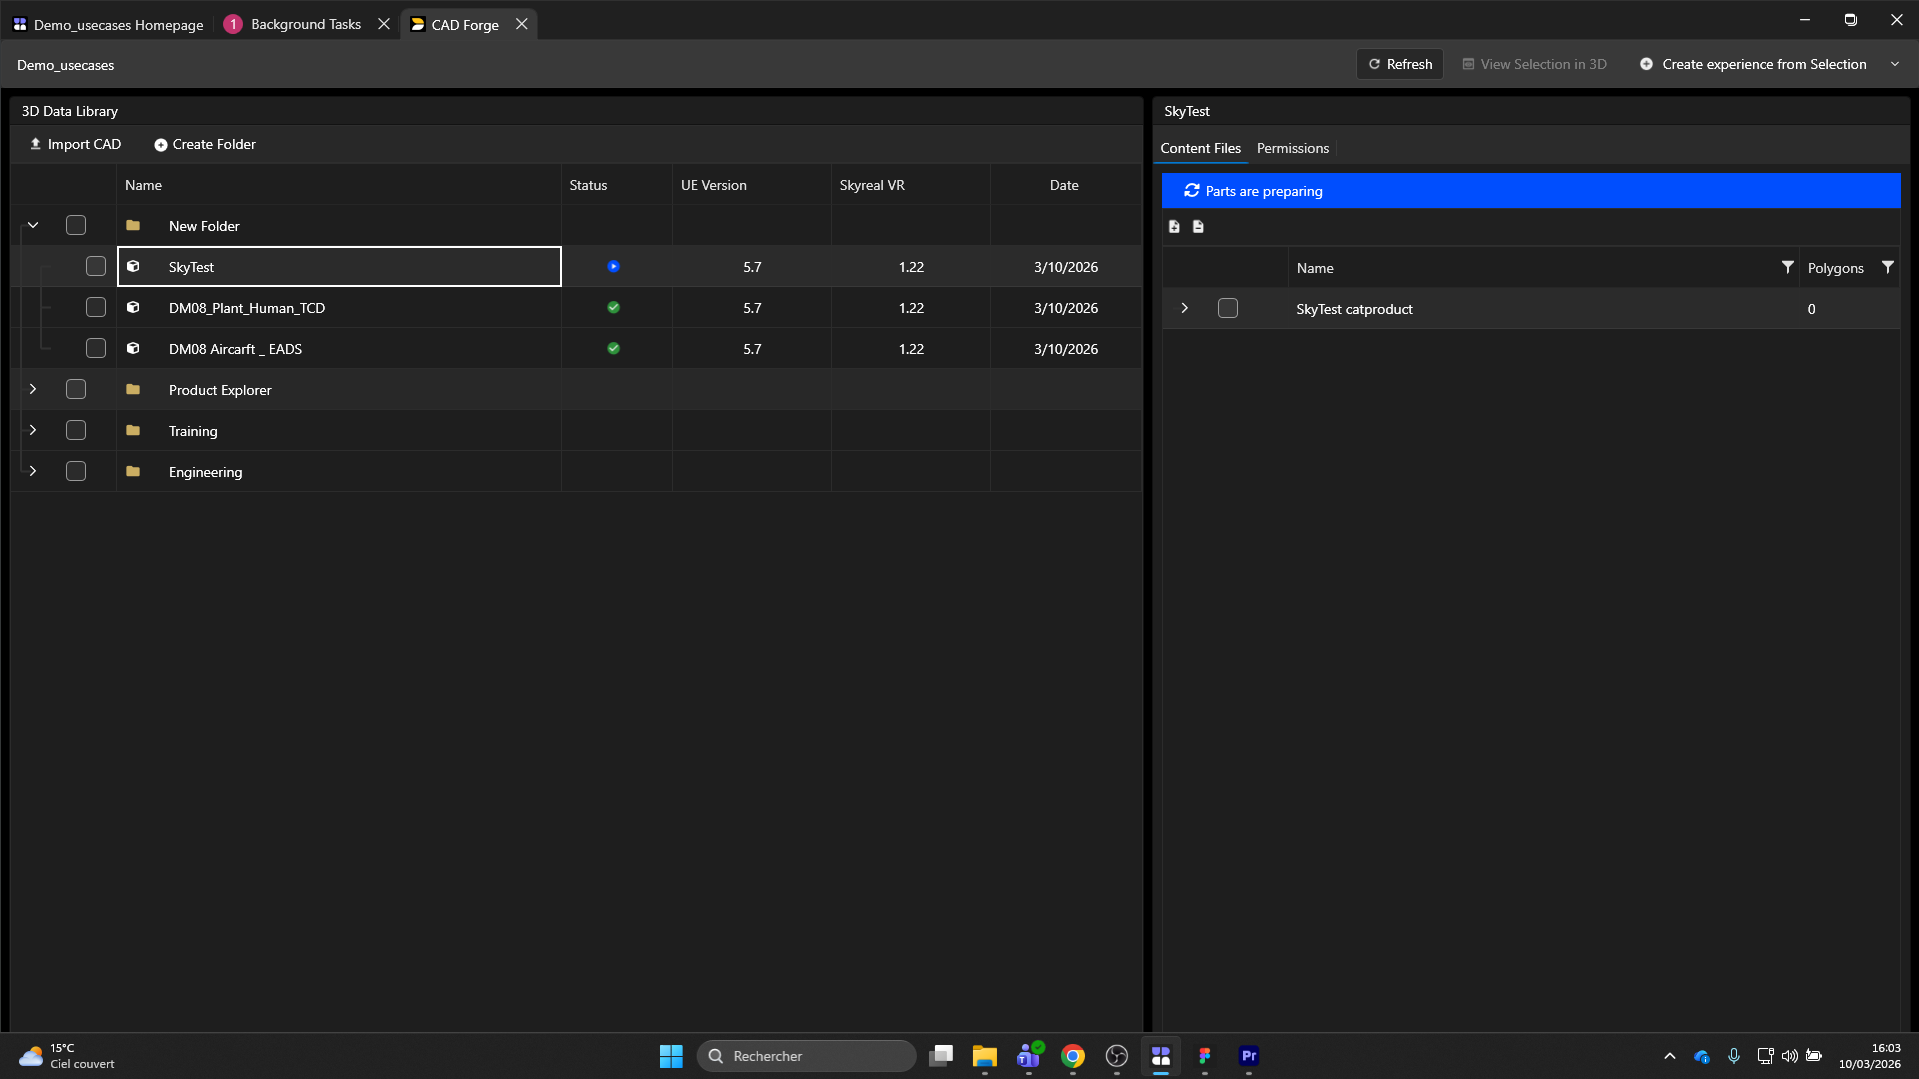
CAD Preparing
A blue banner indicates a preparation task is in progress. Do not close the application while the background task is running. Your CAD must be fully prepared before you can use it in the 3D Viewer or create an experience from it.
Troubleshooting
-
Check your installation: Your Deck version, XR Center version, and Prep Agent version must all match.
-
Check logs: Open the XR Center Client App in your browser, log in, and go to the diagnostic page to view errors.
Managing Your 3D Data

Right-click on any CAD file in the 3D Data Library to access the following actions:
|
Action |
Description |
|---|---|
|
View 3D |
Opens the 3D viewer to display the selected CAD |
|
Prepare Parts Visualization |
Triggers preparation of parts for VR viewing |
|
Rename |
Renames the CAD file (does not affect product structure) |
|
Delete |
Removes the CAD file (Owner permission required) |
|
Create Folder |
Creates a folder for organizing your 3D Data Library |
You can create folders and use drag-and-drop to organize your CAD files within the 3D Data Library.
Creating Experiences from 3D Data
Before starting, ensure you have already imported 3D data into your library.
-
Select your CAD by checking the checkbox — you can select the full CAD, specific subparts, or parts from different CAD files.
-
Click View Selection in 3D to verify your selection.
-
Click Create Experience from Selection.
-
Enter the experience name, thumbnail, and description.
-
Select your experience extensions.
-
Add users to your experience.
-
Your new experience opens automatically.