Desktop Interface
Upon opening your Skyreal VR simulation, you will begin in the Desktop Interface, as shown below:
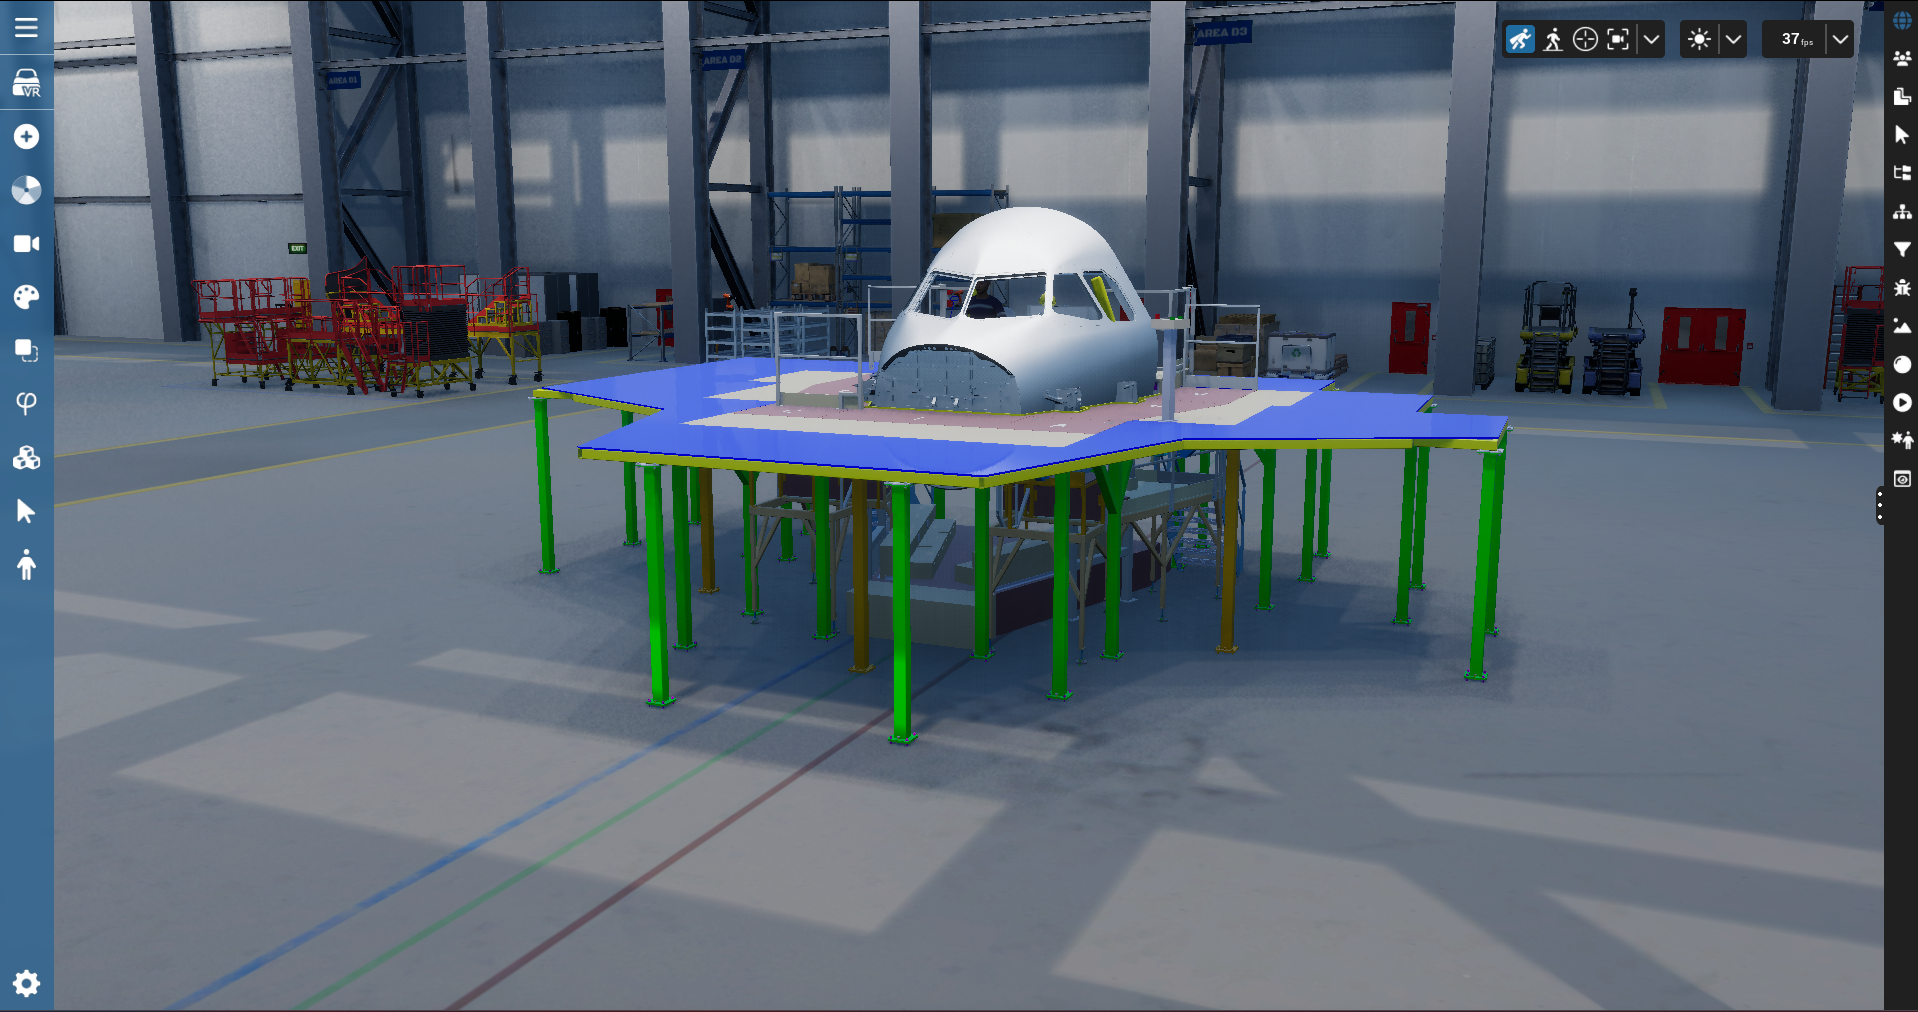
This interface is divided into three parts:
Left Menu: It provides access to several Skyreal VR commands. It is possible to customize this menu so that it fits your needs.
Main viewport: navigate through the model and select parts
Right Menu: It displays information regarding the parts, the scene and the product tree, and offers some advanced features like a filtering system and animation controls.
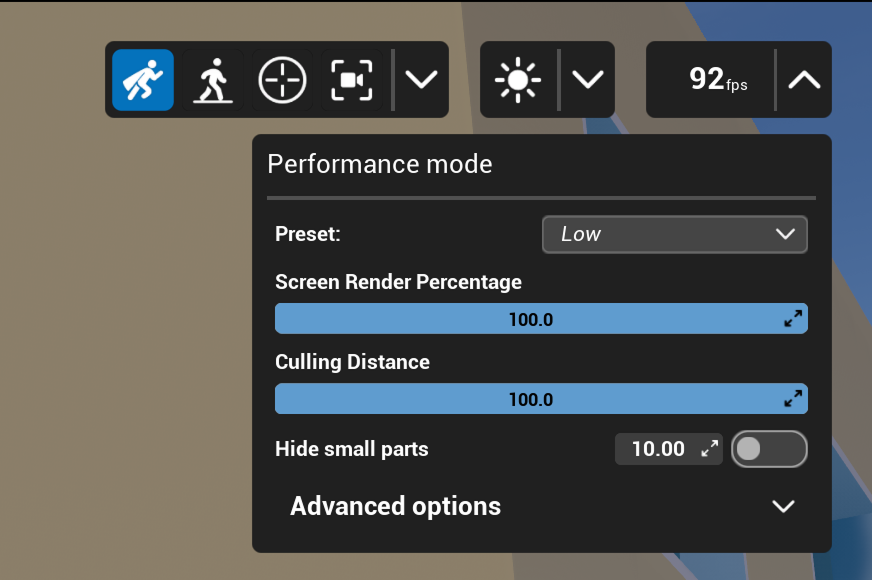
You can find some utility buttons on the top right corner of the viewport:
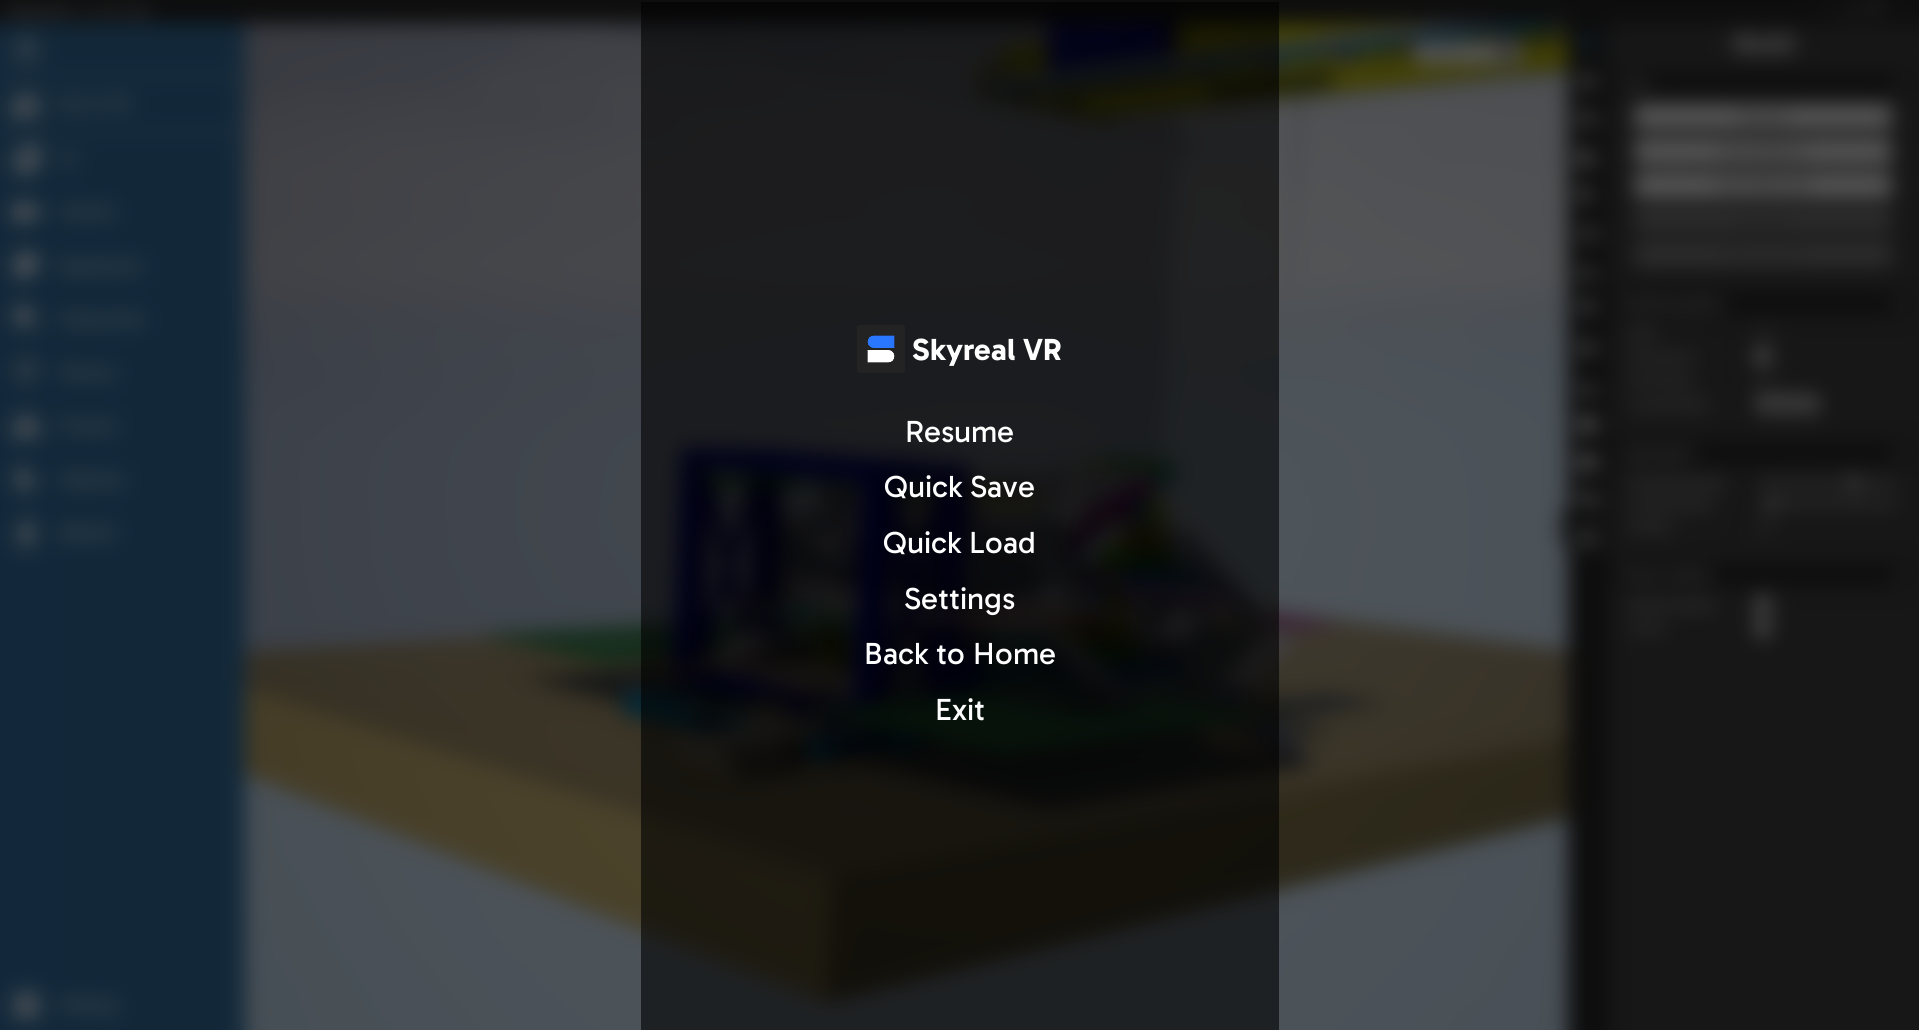
Pressing the ESC button give acces to some quick actions and Skyreal’s VR general Settings (setup and keybindings)
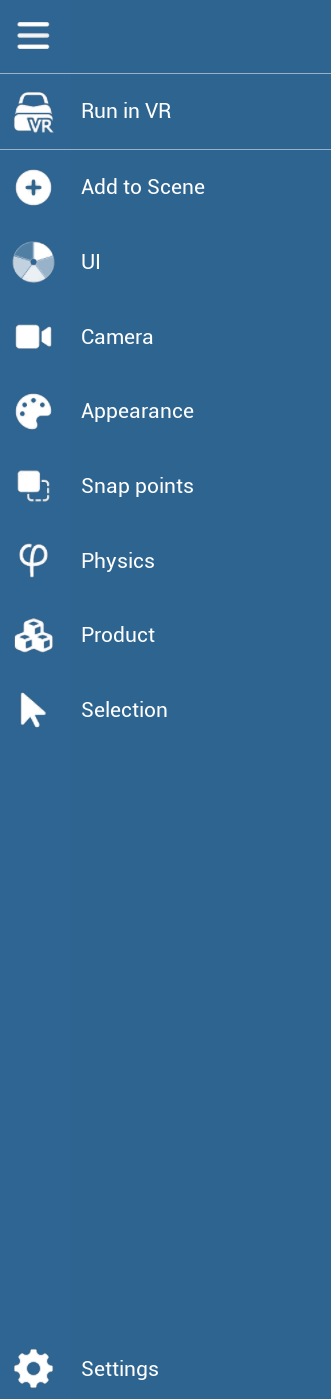
Left Menu Commands
The command menu is located on the left side of the desktop interface. It is always visible, but you can expand it to view the submenu names by clicking the Expand/Collapse button at the top of the bar. The default command menu should look like the screenshot below; however, it is fully customizable.
Right Menu Commands
The state menu (also known as the detail panel) is located on the right side of the desktop interface. To open it, click the button in the middle-left of your screen or press the Tab key.

VR Interface
When using the VR mode, Skyreal VR offers several ways to launch commands to display information or interact with objects in VR.
VR Watch and Tablet
The Tablet is the central interaction hub within SkyReal’s functionalities. It allows users to launch or edit any feature, as well as interact with 3D elements directly in the VR environment. By default, the tablet is attached to the user’s hand, but it can also be made to float in front of the user and can be summoned or dismissed as needed.

The interface is divided into a user's watch, a toolbar, and some feature-specific panels with quick access buttons. All interactions are performed using VR controllers.
Tablet Structure
Watch
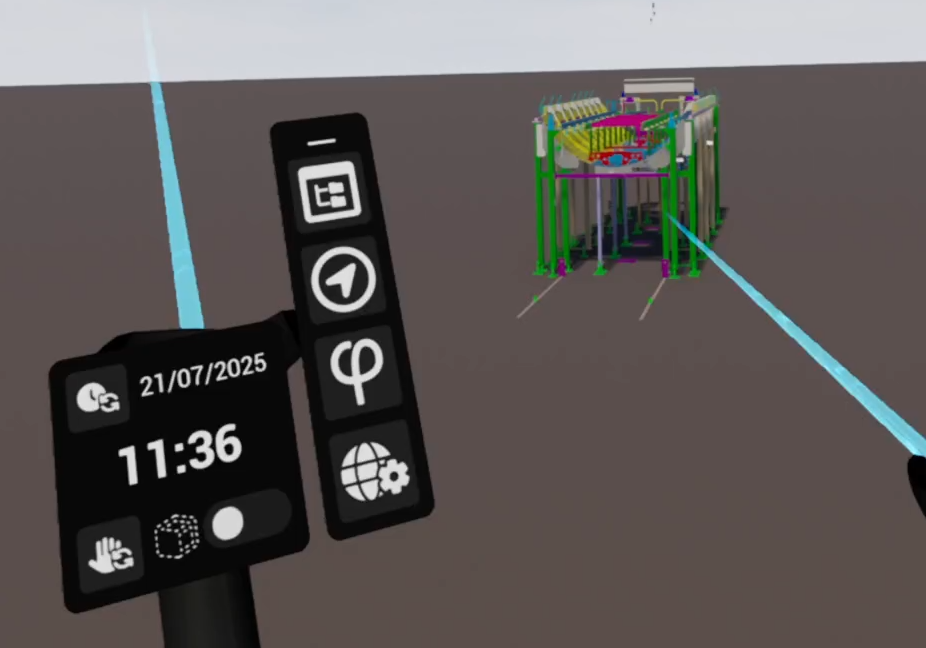
The Watch can be accessed at any time during the VR session. It not only serves as the base for the Tab Bar and Tablet, but also provides its own dedicated features.
Switch to Chronometer Transforms the Watch interface into a chronometer, which can be started, paused, or stopped.
Change Hand Switches the dominant hand used for both the Watch and the Tablet.
Transparent Mode If the Tablet or Pie Menu are blocked due to a crowded 3D scene, this option makes obstructing elements transparent, allowing precise selection.
Retrieve Tablet Appears when the Tablet is detached from the Watch. Tapping this button recalls the Tablet and reattaches it to the user’s hand.
Toolbar or Tab bar (Left Side)
The vertical toolbar contains the main feature shortcuts. This shorcuts can be accesible at any time, even while using other feature. Each button opens a corresponding panel for more detailed configuration. Single tap → Opens the associated feature panel and Active button highlights when its panel is open.
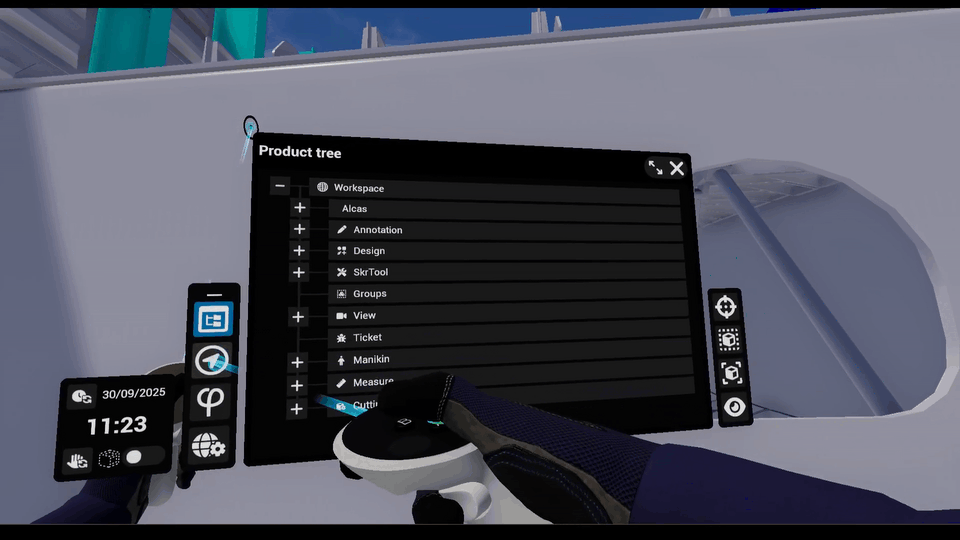
Product Tree
-
Give access to the Product Tree where all 3D components and assemblies prepared are listed. This hierarchy reflects the organization of your root CAD product and selections made in the product structure are automatically replicated in the 3D, or viceversa, enabling efficient selection of entire subassemblies.
-
The Extend button can be used to switch the tablet to a bigger panel. ( )
Extensions List
-
If installed, this tab will display all commands imported from every installed extension.
Navigation
-
Change the navigation mode (walk, fly or teleport)
-
Change the movement speed.
World Settings
-
The user can choose and edit options like the Pie Menu, Save, Configurations, Environment and Parts Selections.
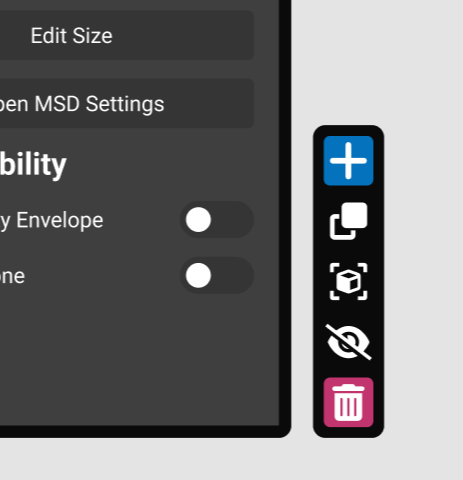
Panels and Context Actions
Panels occupy the central area of the tablet and provide detailed controls for the feature launched from the Pie Menu. Each panel is structured into lists, property editors, and action buttons.
User can point and on every item to interact with it.
When a panel is active, contextual action buttons appear on the right edge of the tablet. These include operations like show, hide, lock, create or delete.
Closing Panels:
Use the close button (top-right of the panel) or re-tap the active toolbar icon to dismiss a panel.
The Exit button can be used to close the tablet.
The Tablet display can be disabled by using the "Toggle Tablet Visibility" command.
Pie Menu
You can use the Pie menu to launch commands. To open the Pie-Menu in VR, rapidly press the pie menu button, or press and maintain the pie-menu button to use the on your controller.
Once you are comfortable with the default Skyreal VR menu, you can create your own pie menu.
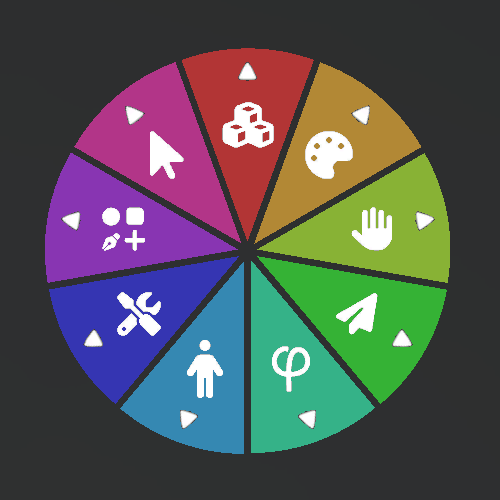
The Pie menu is composed of several slices that can be of different type:
-
Sub Menu slices: Used to display a sub-pie menu. They have a white arrowhead near their border.
-
Command slices: Used to execute a VR action in Skyreal VR. Click here for detailed explanations on Skyreal VR commands.
-
Command Toggle slices: Used to execute a VR toggle action in Skyreal VR. Toggle slices have two icons: enabled and disabled (The enabled icon will be displayed when the command is enabled, and vice-versa for when the command is disabled).
How to use the Pie Menu?
Using the Laser Pointer
To open the Pie Menu, press and release the designated menu button on your controller. To close it, press the same button again while the menu is open.
Once the Pie Menu is active, you can interact with any pie slice using the two laser pointers from your controller. Simply point a laser at the desired slice and click trigger to select it.
If a pie slice shows a small arrow, it means a sub-menu is available. Click the slice to open the sub-menu. If both lasers are pointing at different slices, the slice targeted by the most recent laser will be selected.
The Pie Menu also features a central button labeled "Close" or "Back." To execute the indicated action, click this central button with one of your lasers.
By Hand Movements
To navigate the Pie menu keep pressed the pie menu button on your controller, and while pressed, move the controller on which you are pressing the pie menu button so that it hovers the desired slice. There are now two options:
-
If the desired slice has a white arrowhead near its border, move the controller towards its edge. Once you reach the border of the slice, a submenu will appear.
-
Otherwise if the desired slice doesn’t have a white arrowhead near its border, release the pie menu button and the command associated to the slice will be executed (see Command execution below for more detail).
If the pie menu is not in a convenient place you can move it pressing the index trigger.
Command slices are executed on selected parts. This means that you need to select the parts you want to work on before executing the command.
⚠ If no parts are selected, some commands like "Reset Part Position" will be applied on every part.
Pie Menu Configuration
Skyreal VR offers three preset menus, each tailored to specific use cases: Engineering, Manufacturing Validation, and Marketing. These menus are available in both the VR and desktop interfaces, ensuring a seamless experience across platforms.
You can also make your own custom pie menus.
Pie Menu Configurations by Use Cases
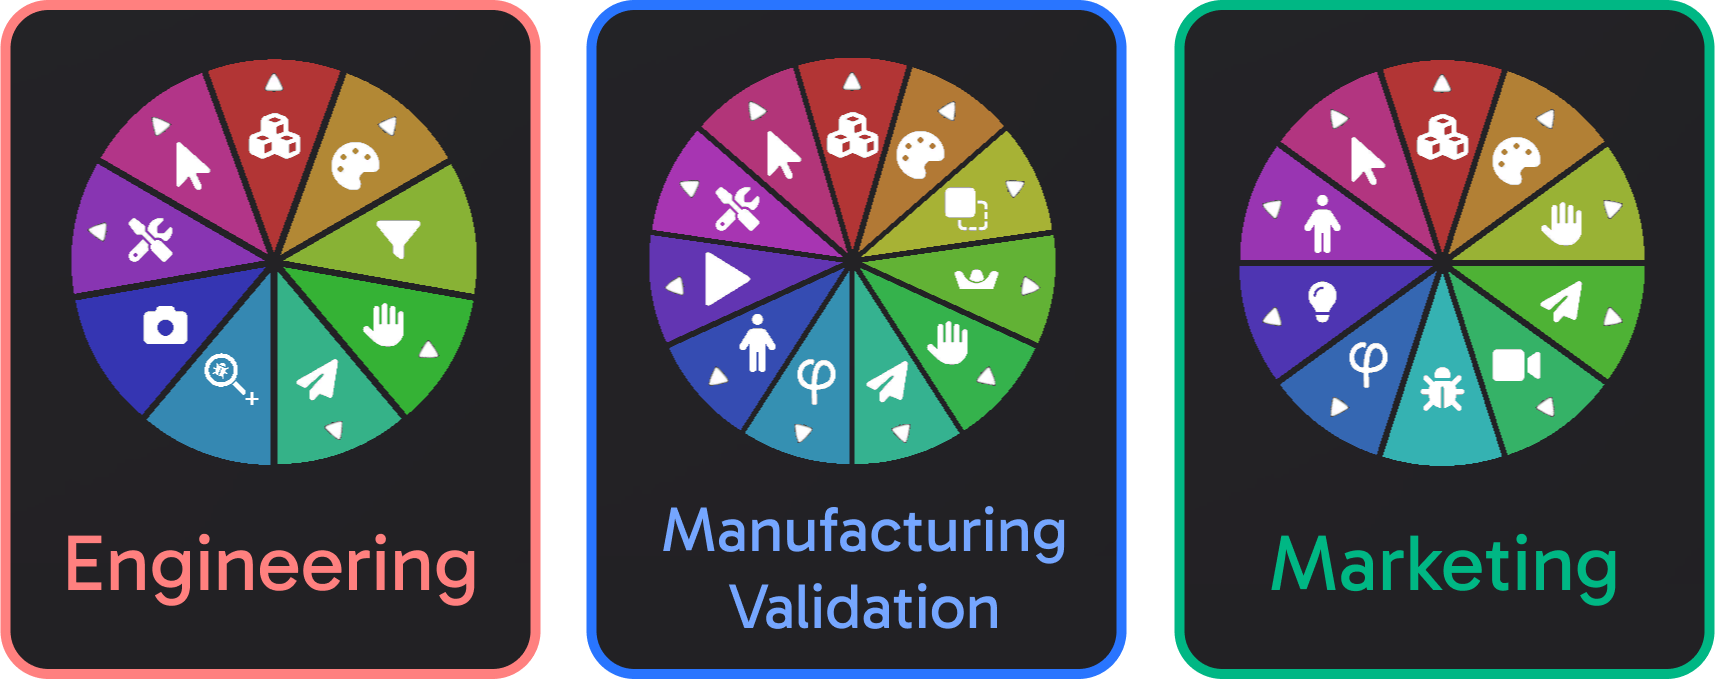
The Default Pie Menus list includes a variety of preconfigured setups designed for specific use cases and user types. These menus are:
Manufacturing Validation Designed to simulate processes, address ergonomics issues, and identify risks, ensuring a more reliable production environment.
Engineering Tailored to create a VR work environment that meets the essential requirements for efficient design reviews.
Marketing Helps create your product showcase with options for different product configurations and delivers spectacular rendering outputs.